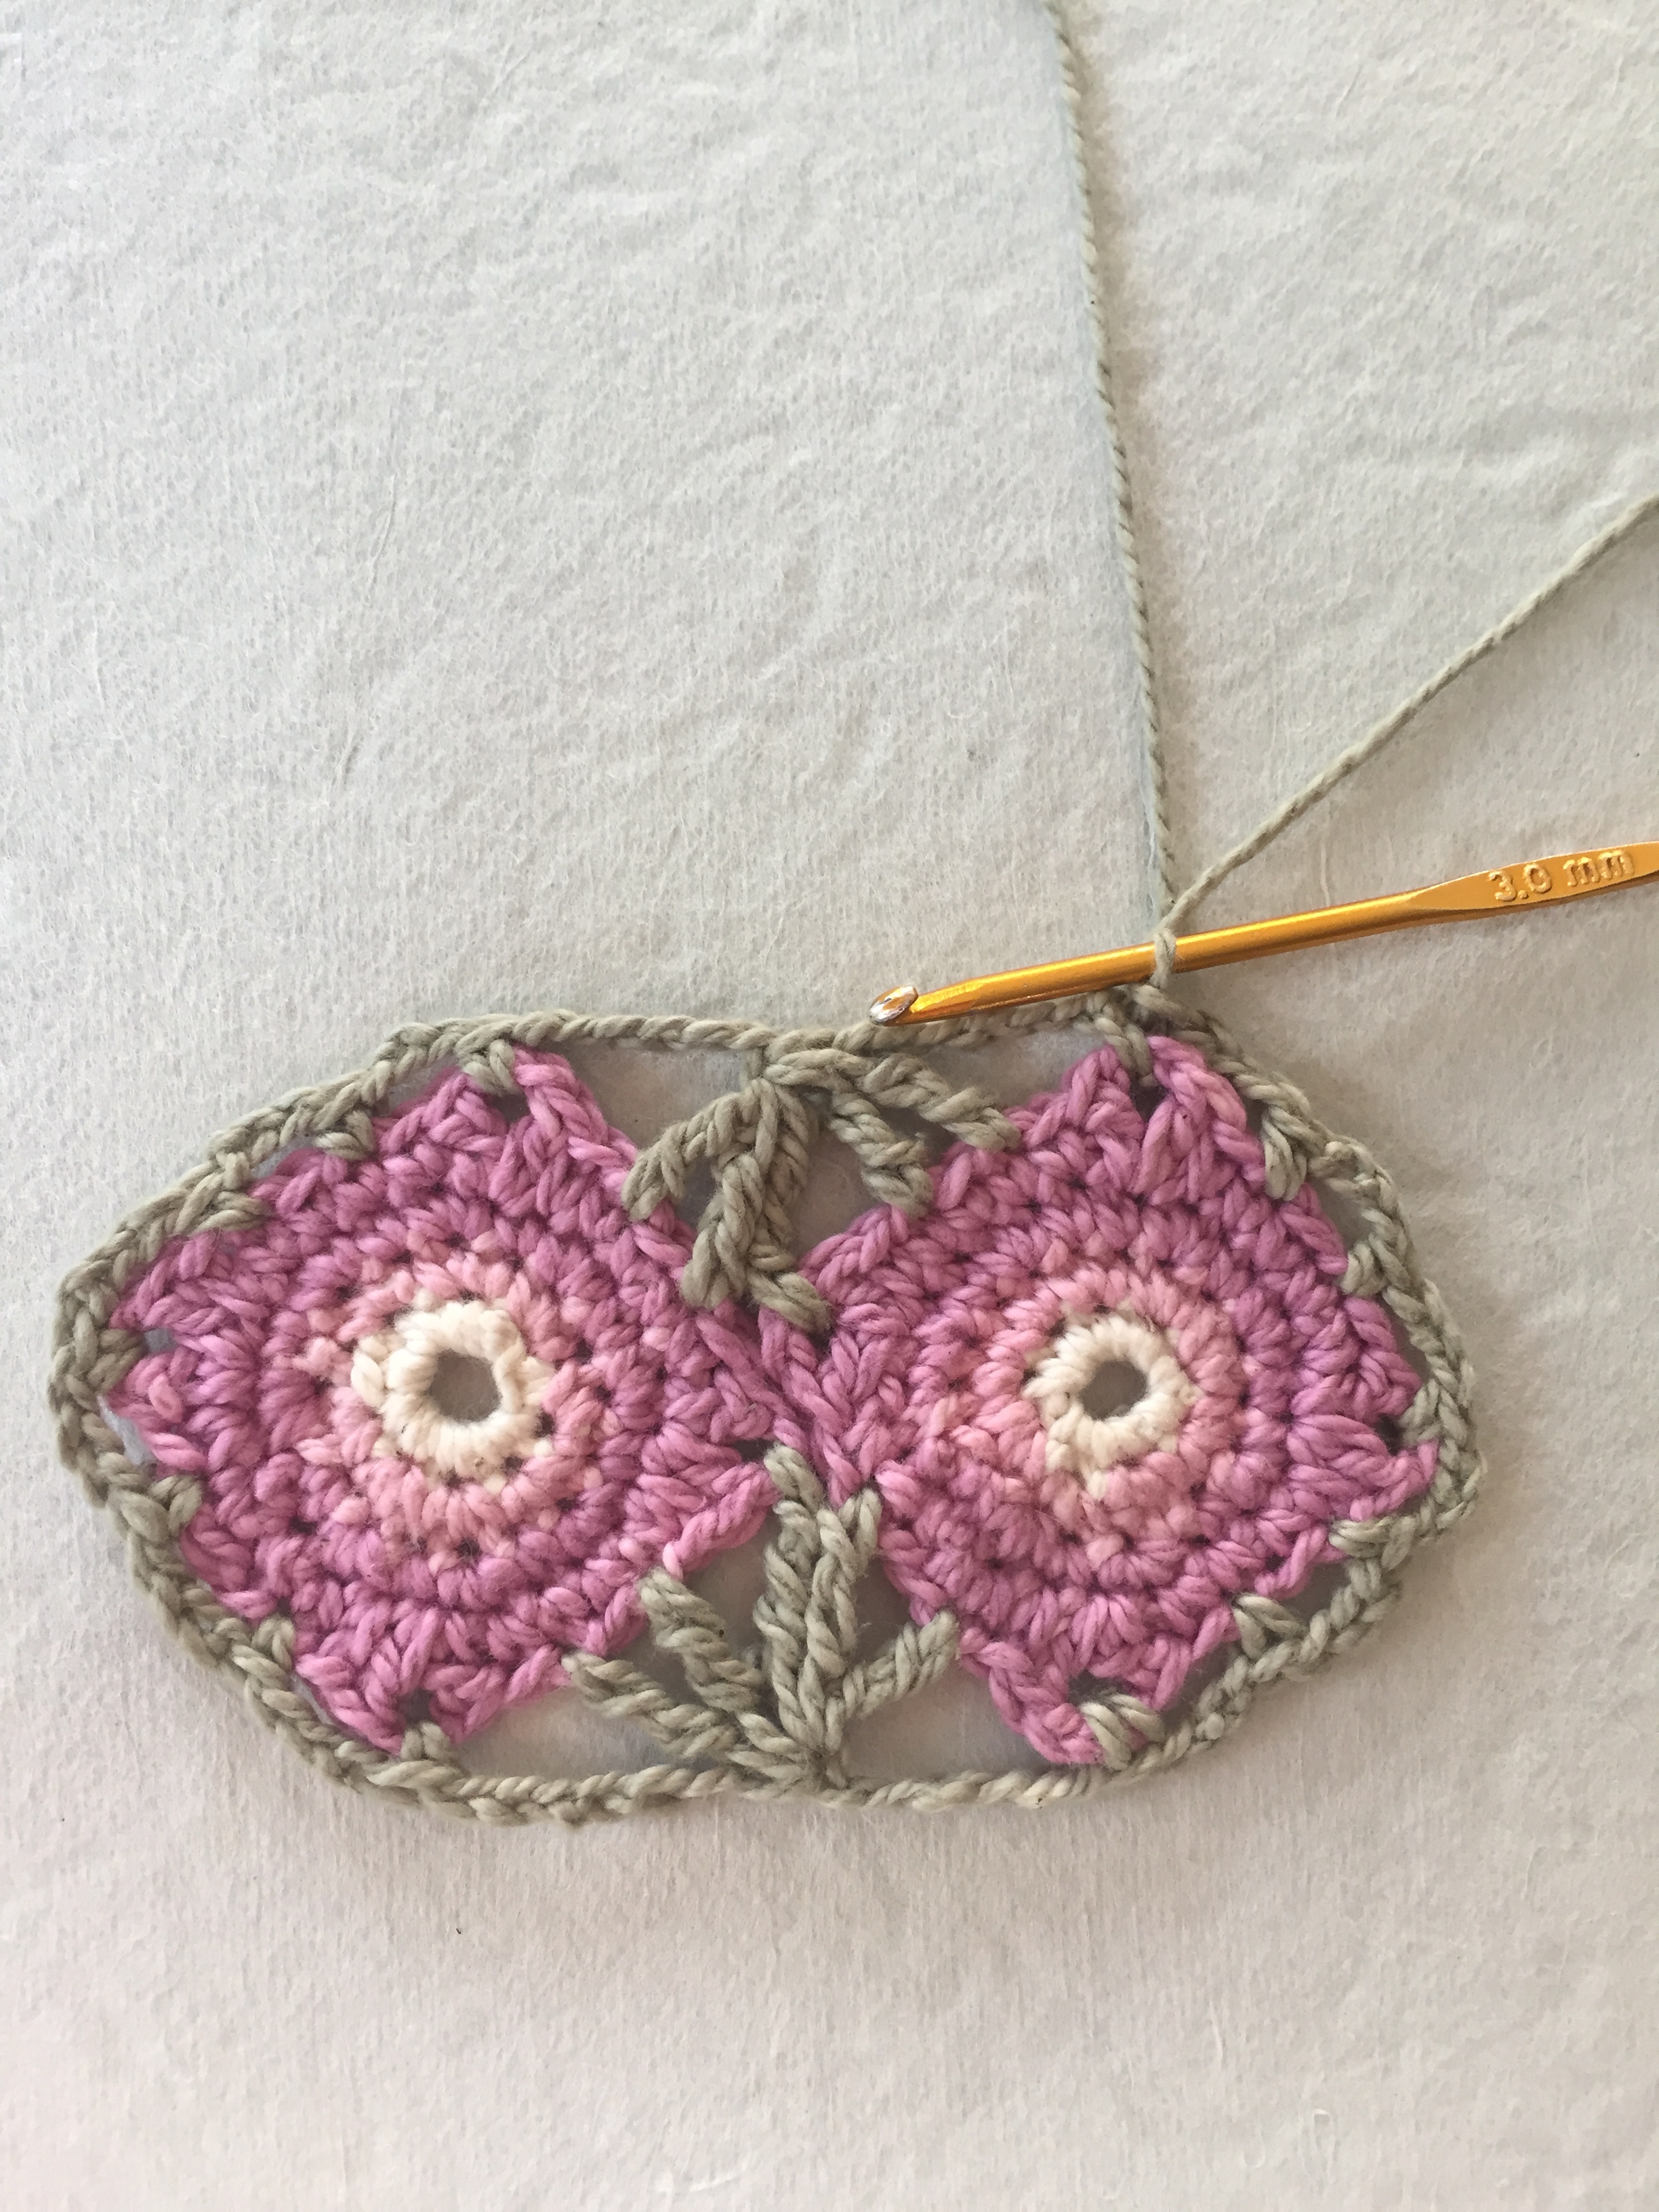
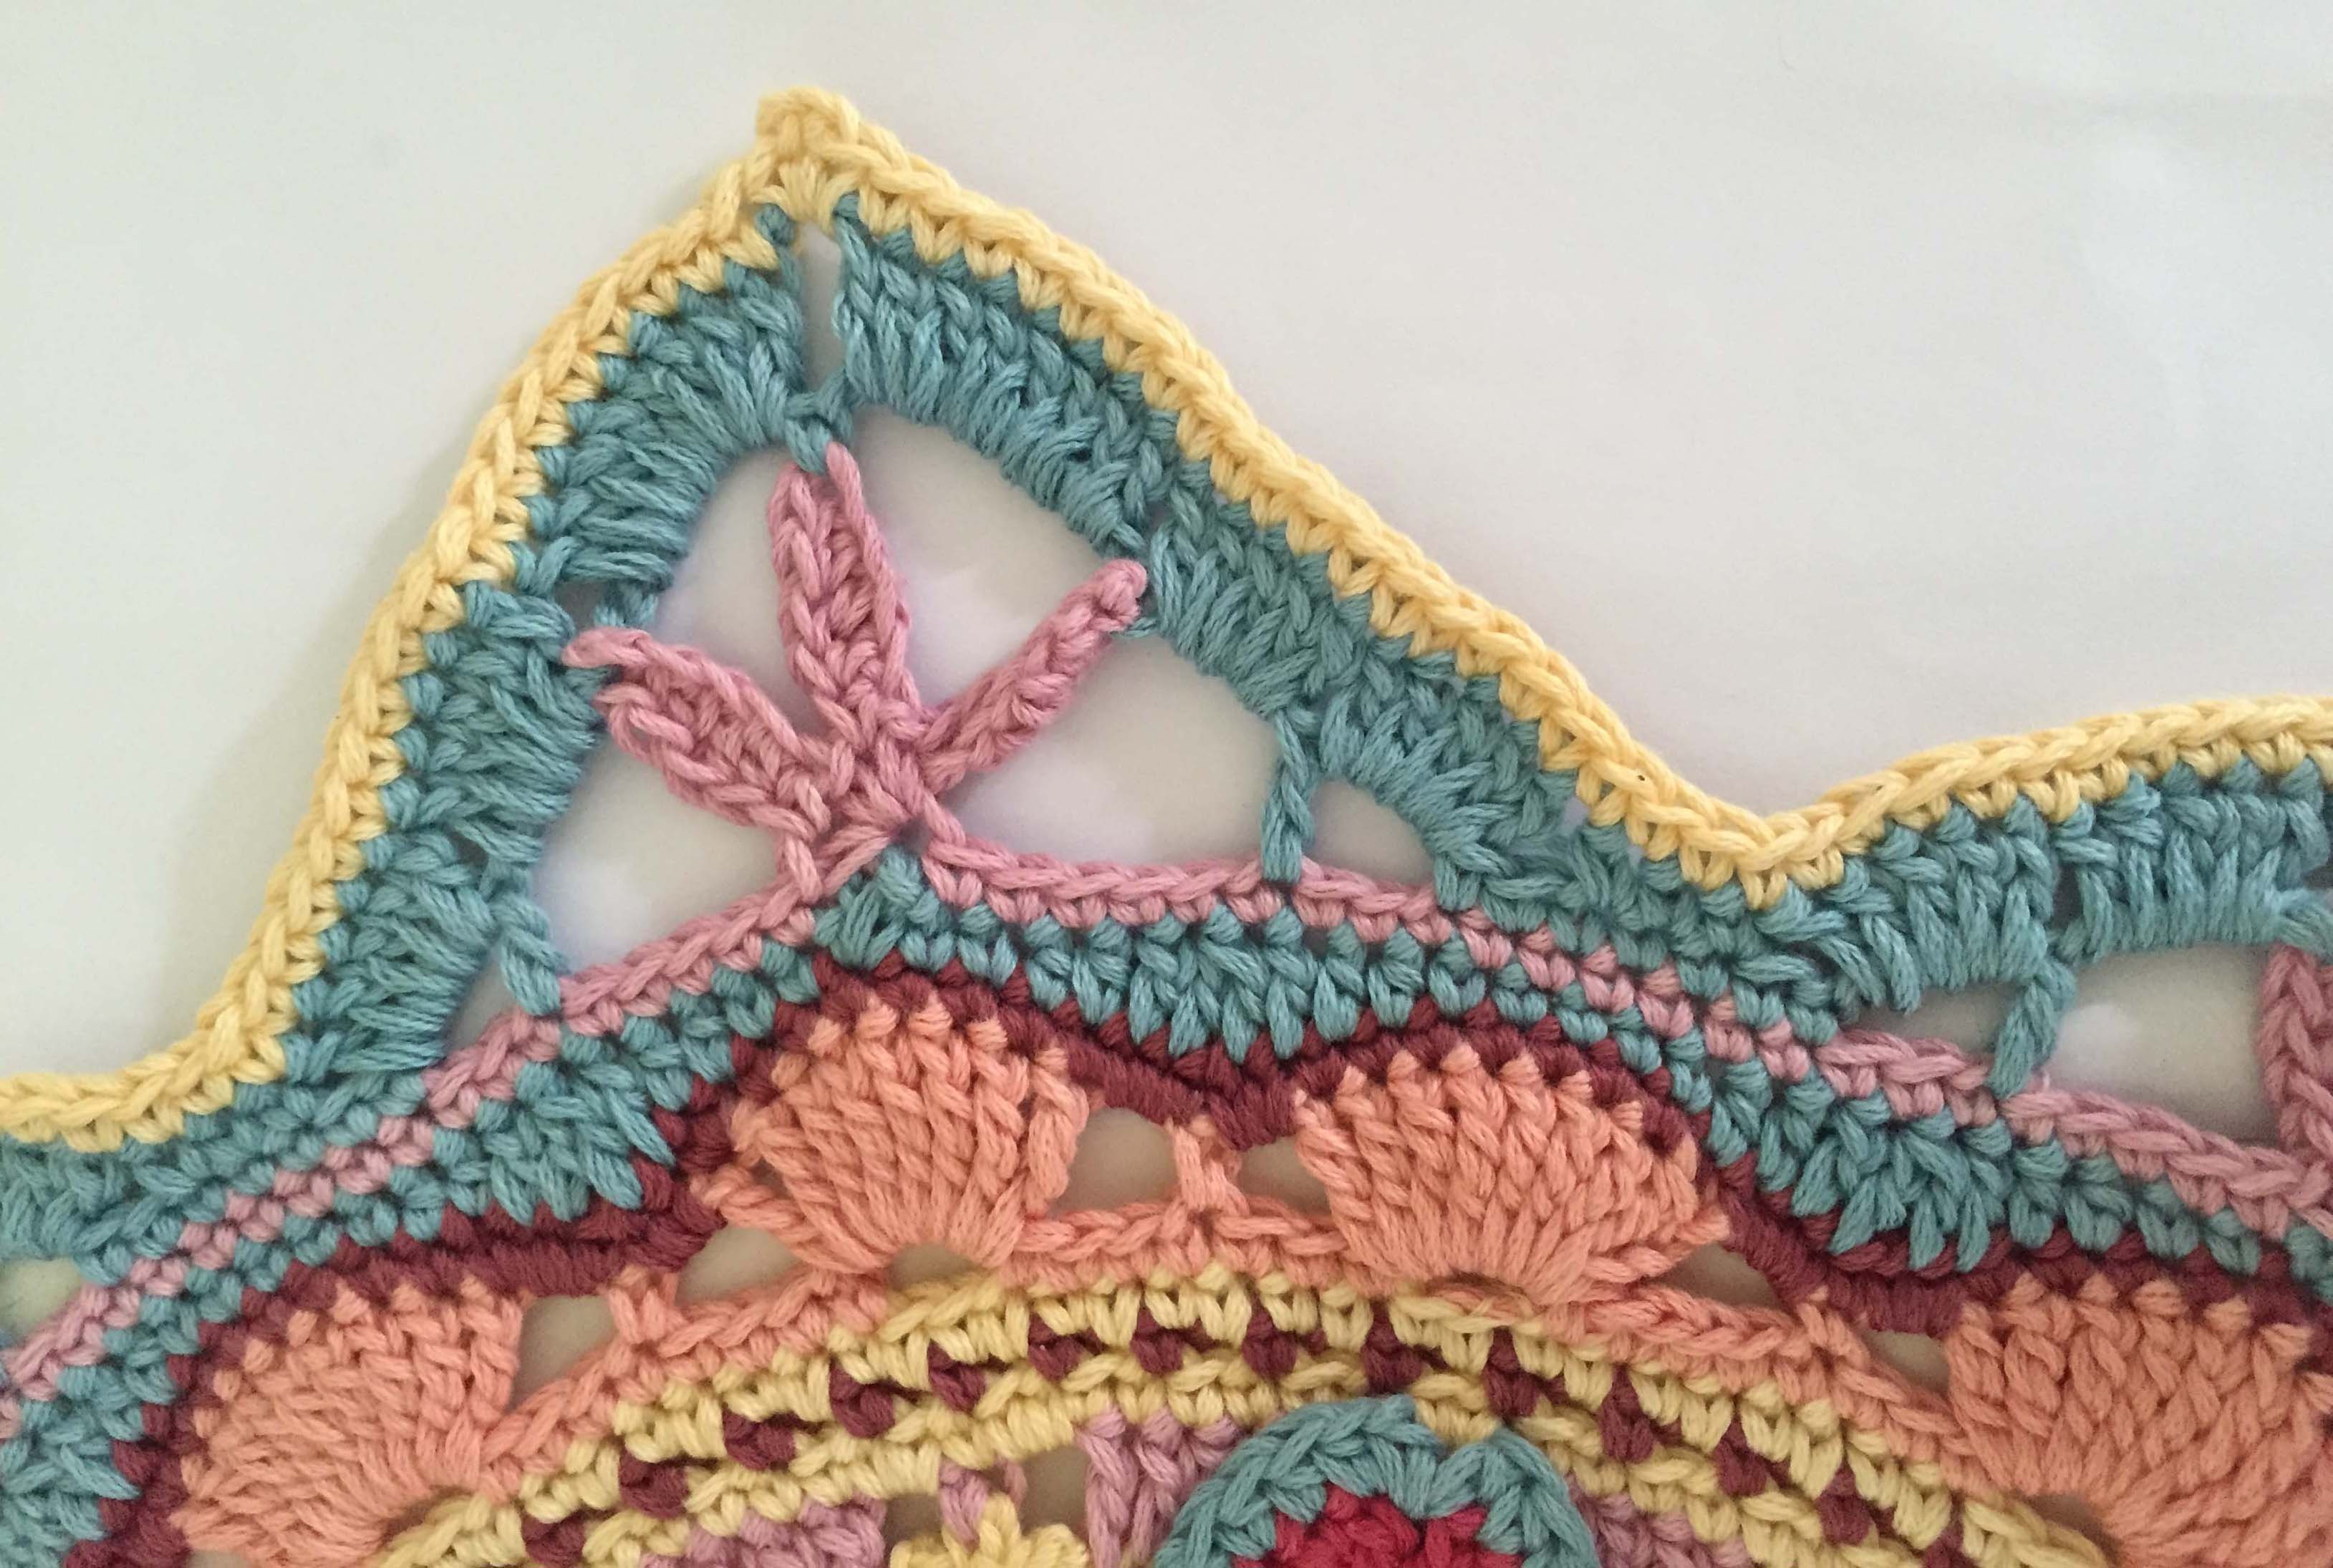
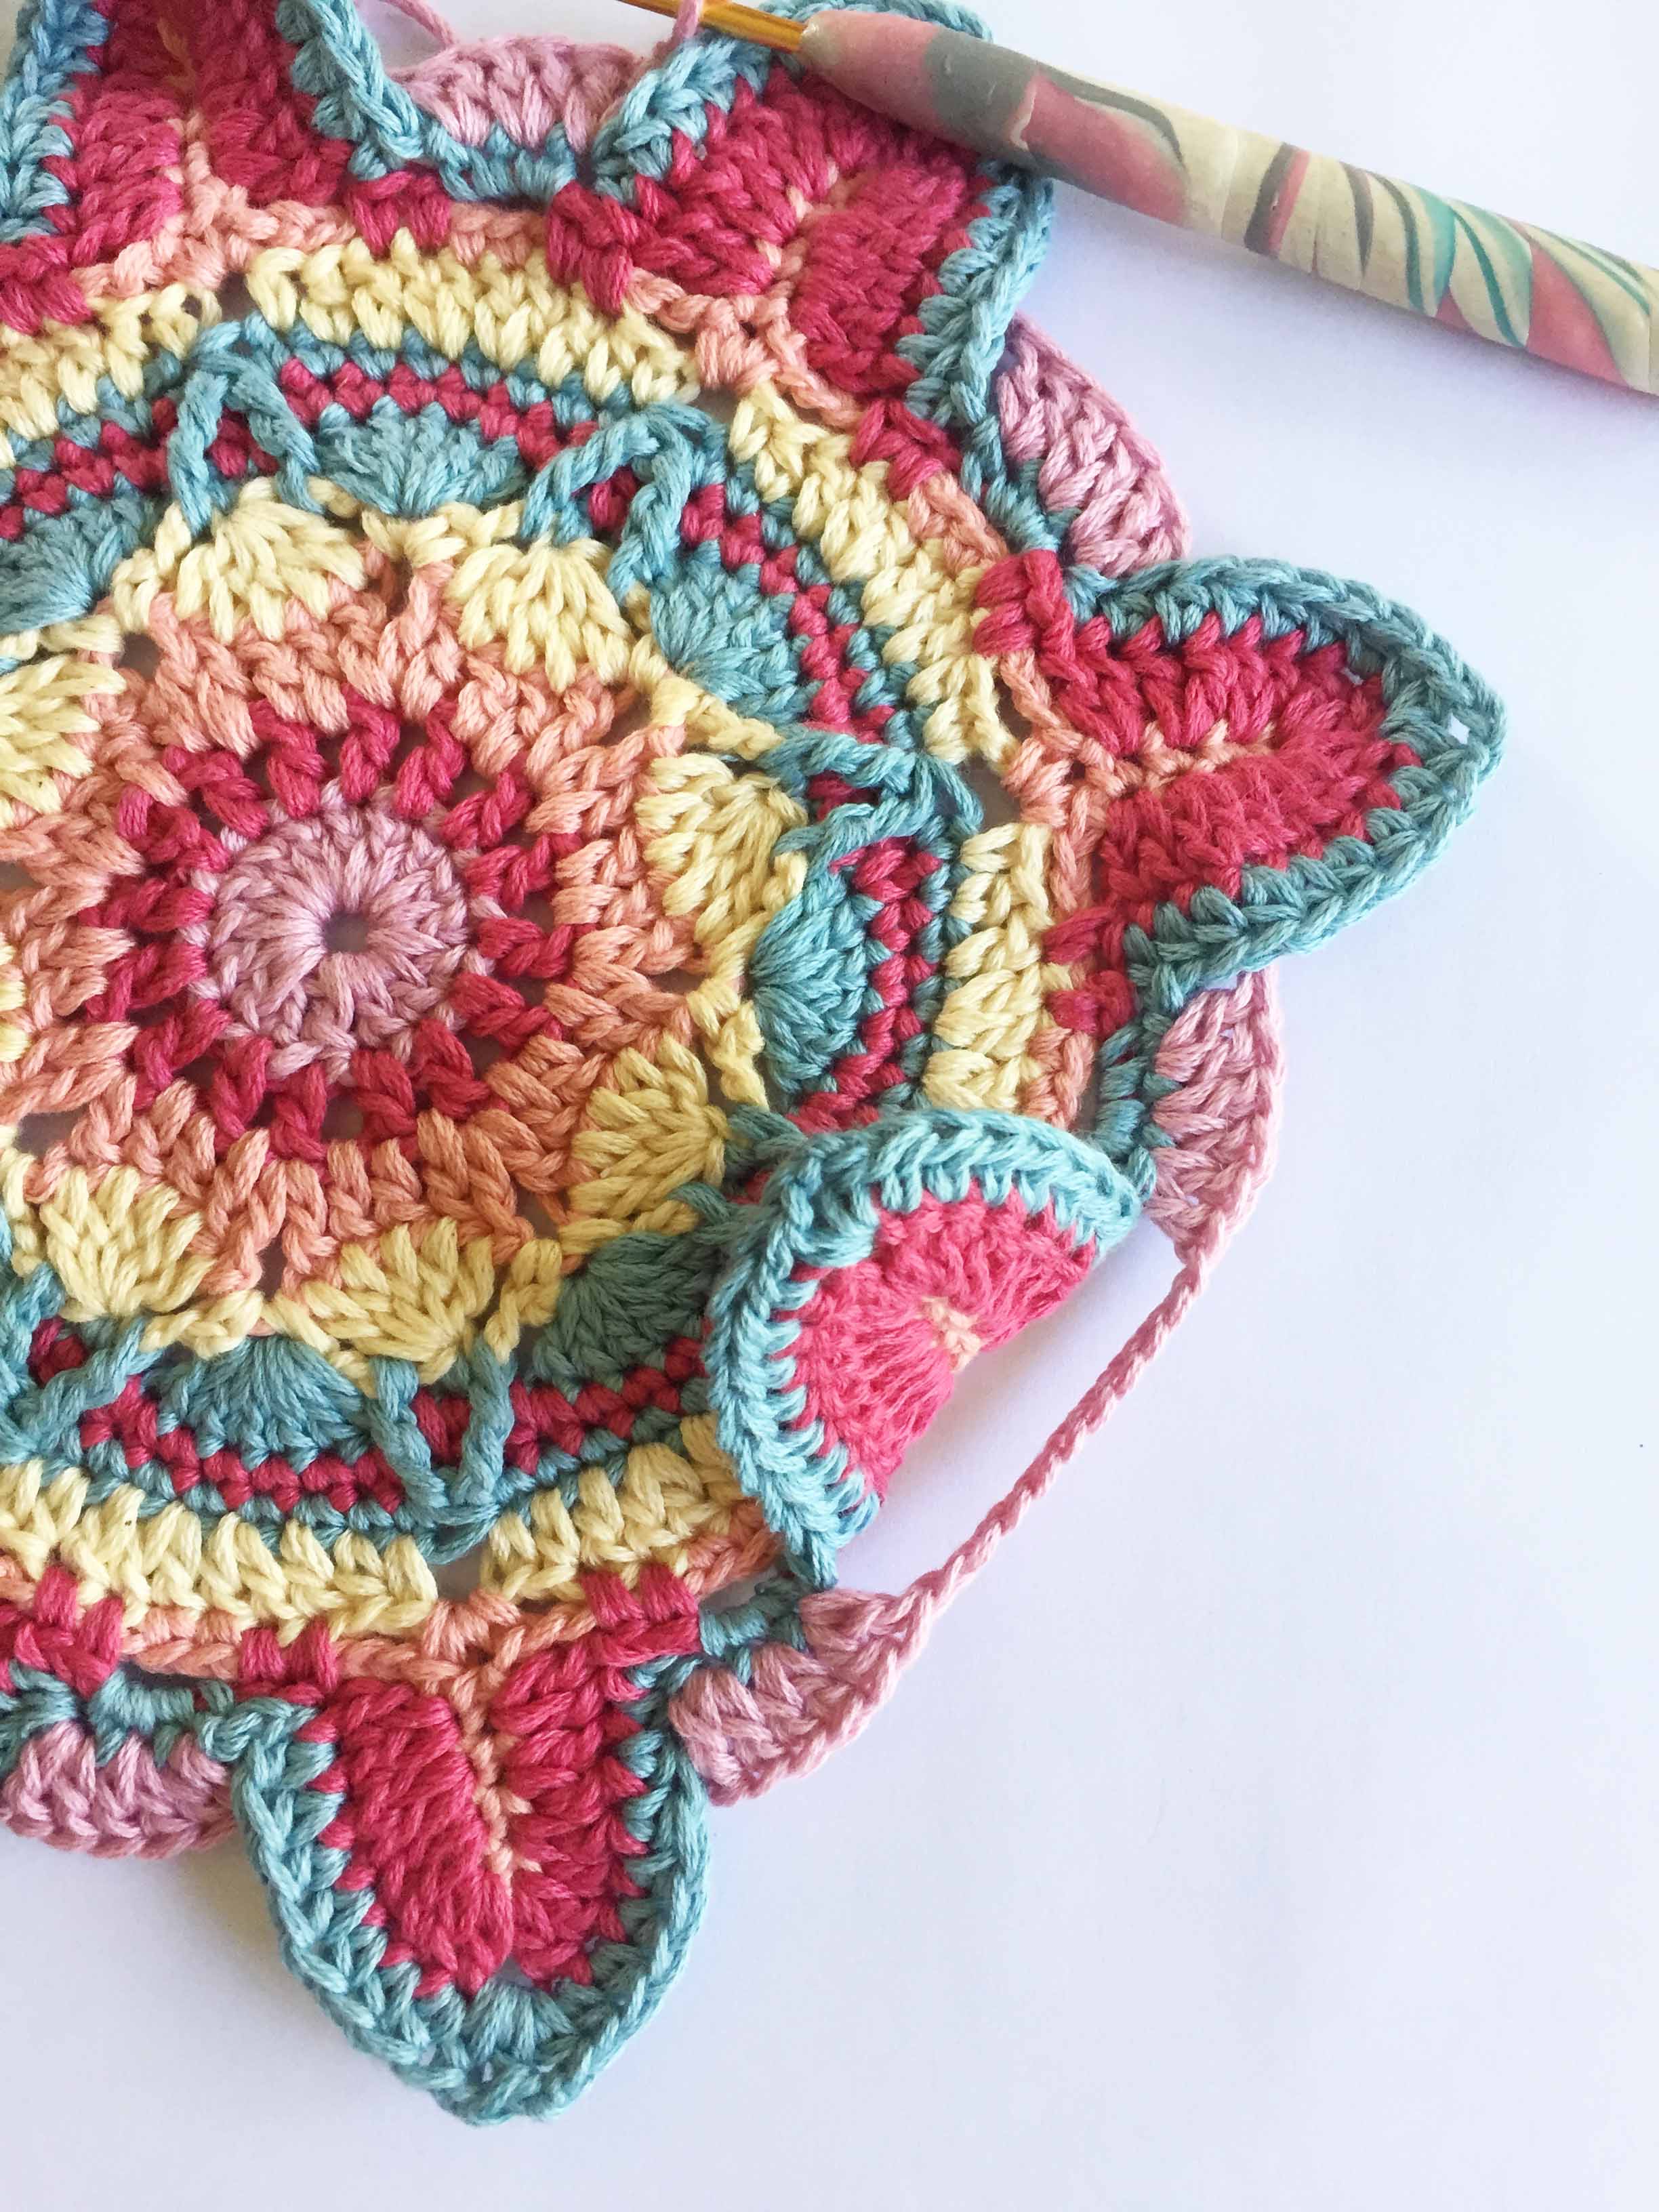
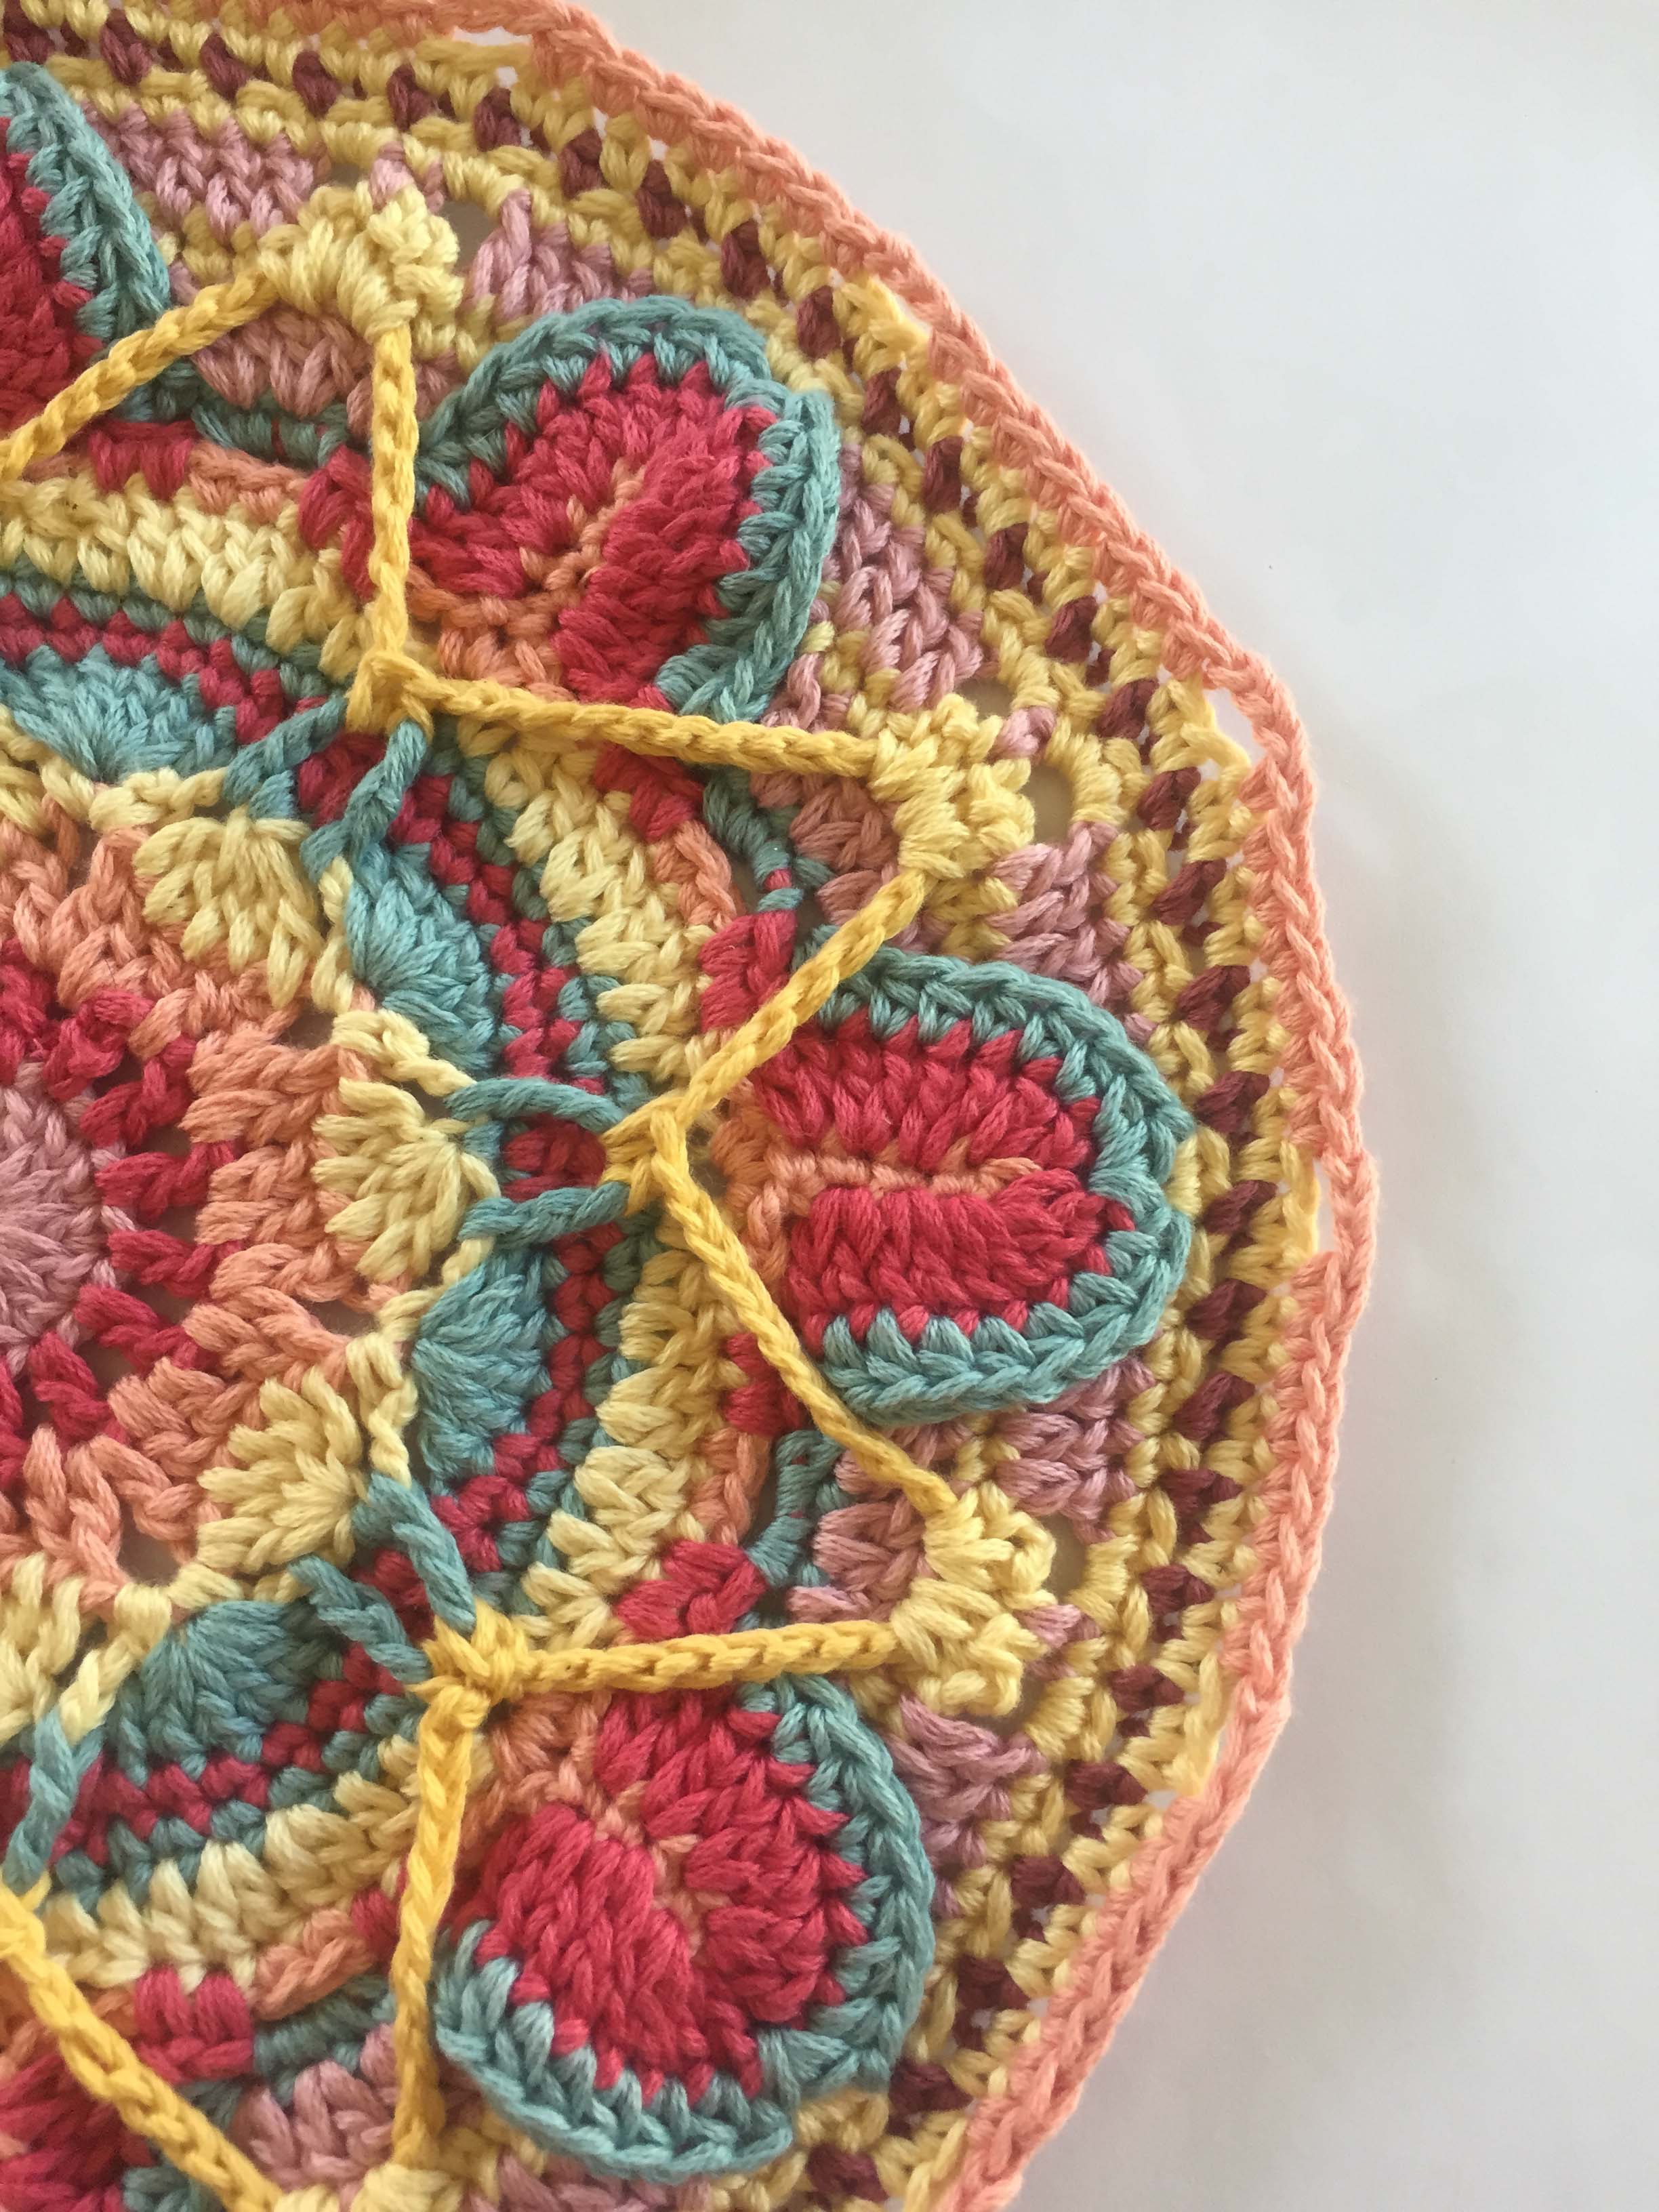
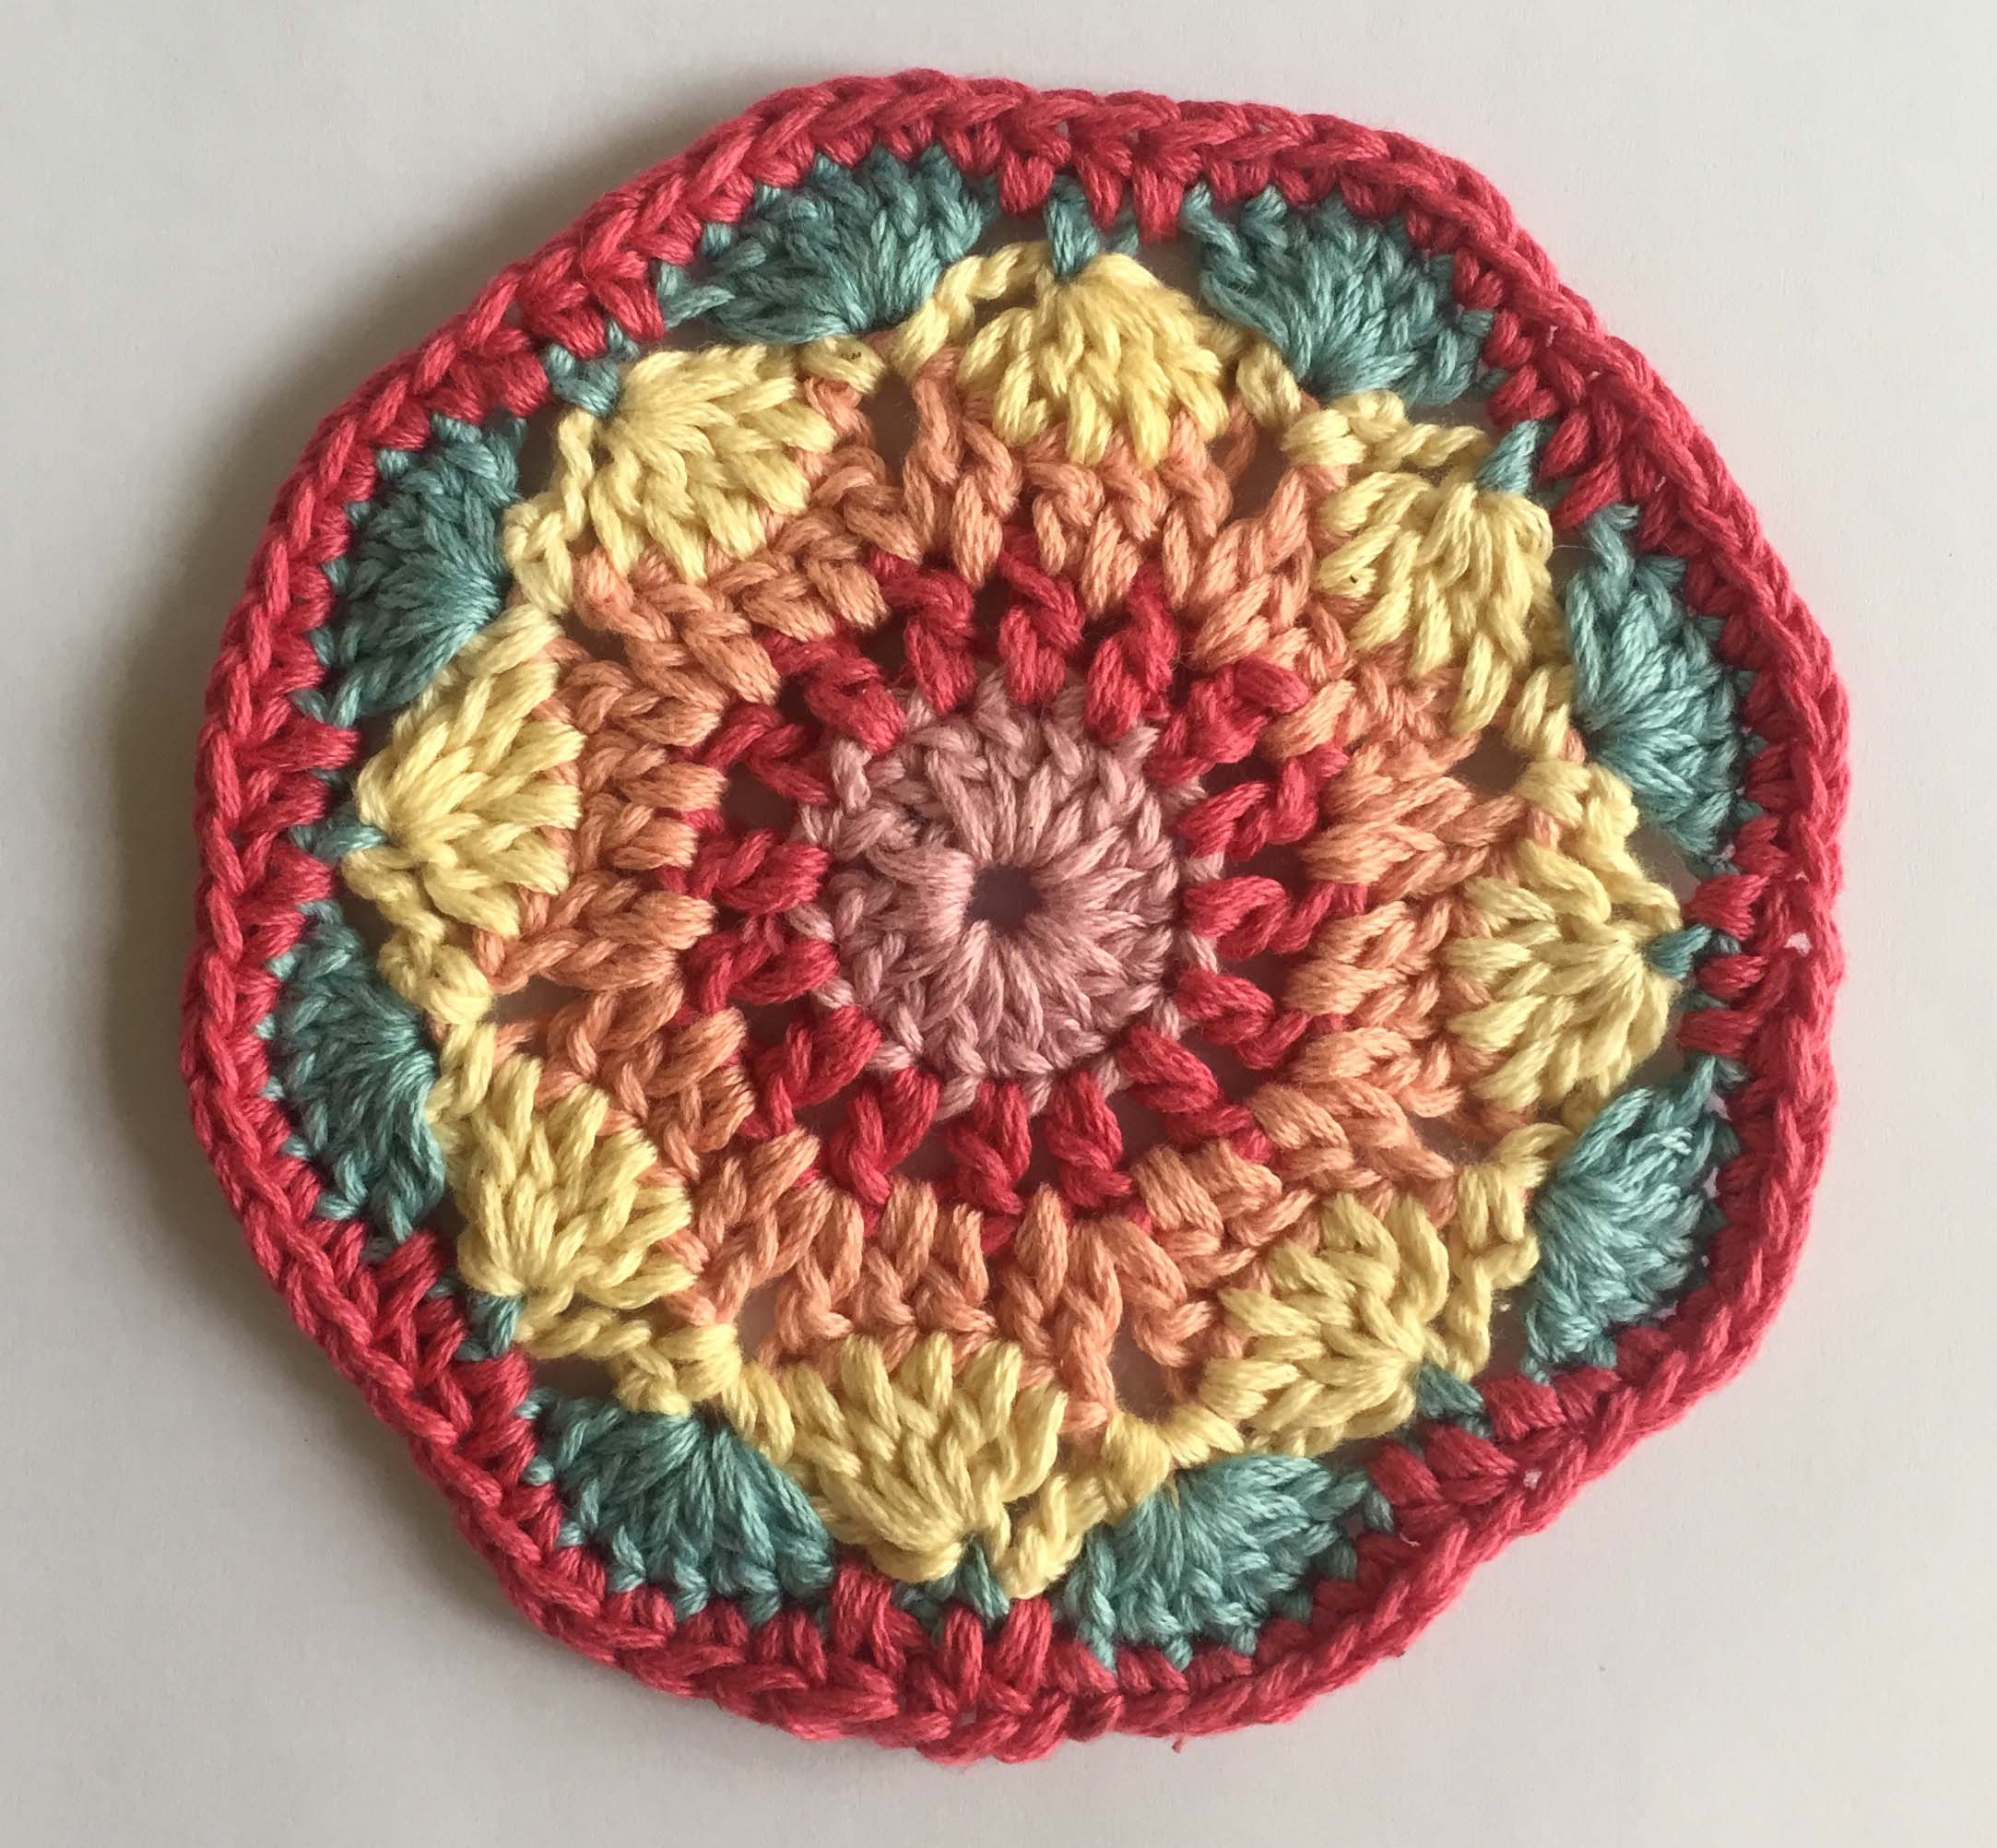
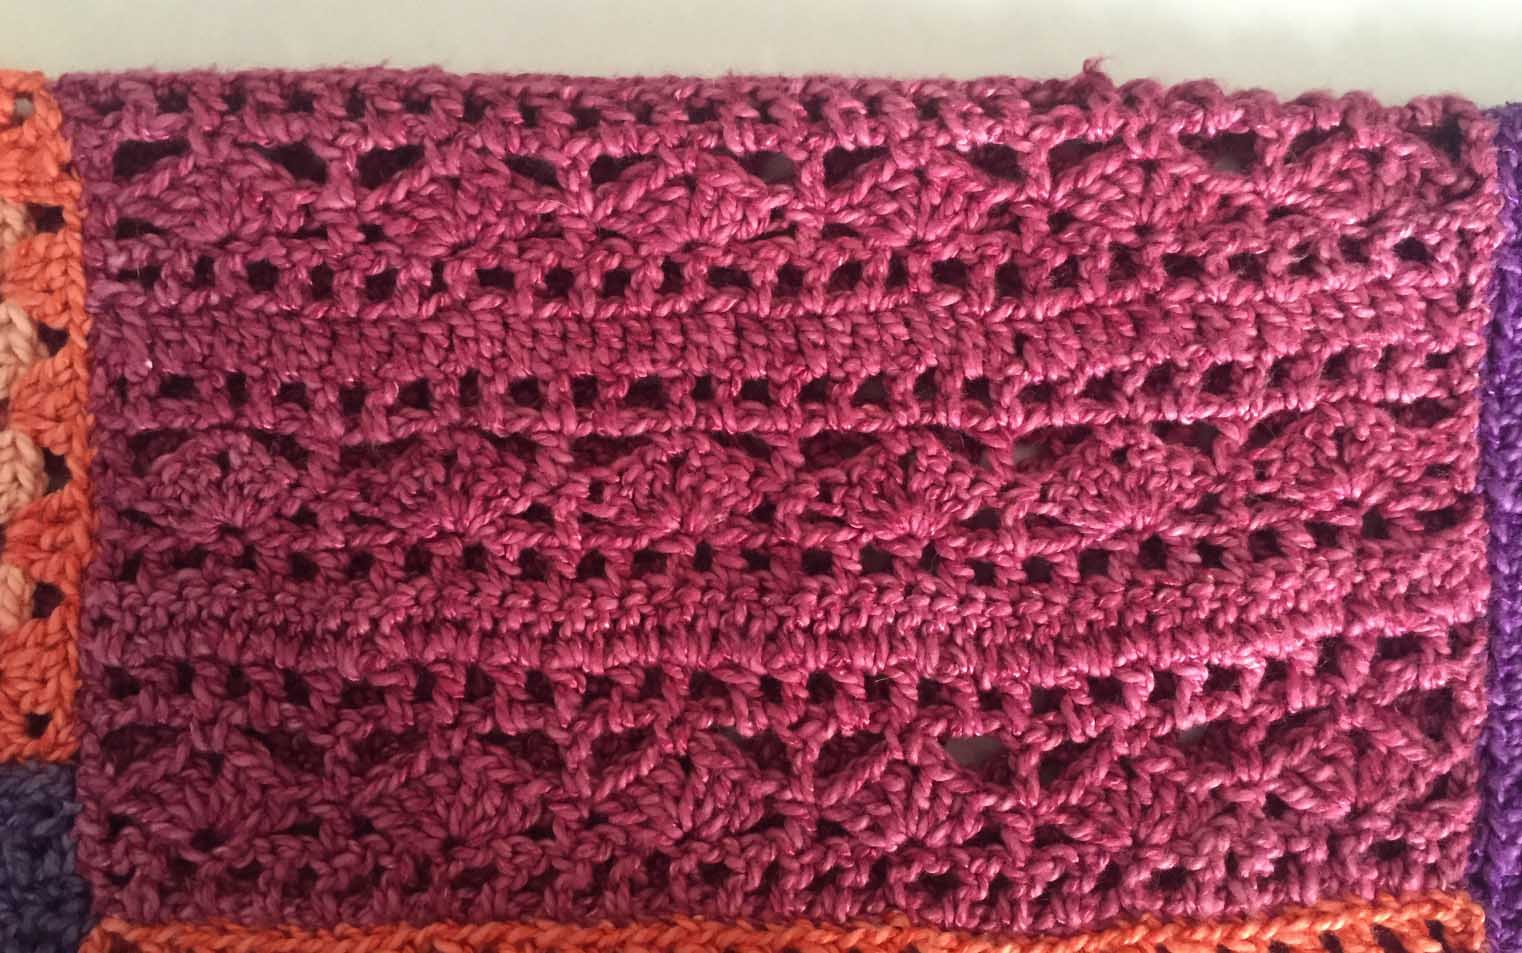
As promised, I am happy to share four Granny Square patterns that make unusual blankets when joined. Each square has a fully written pattern in American terminology, a diagram, a photo of the individual square as well as a picture of the square when joined. I hope you have fun in doing these squares.
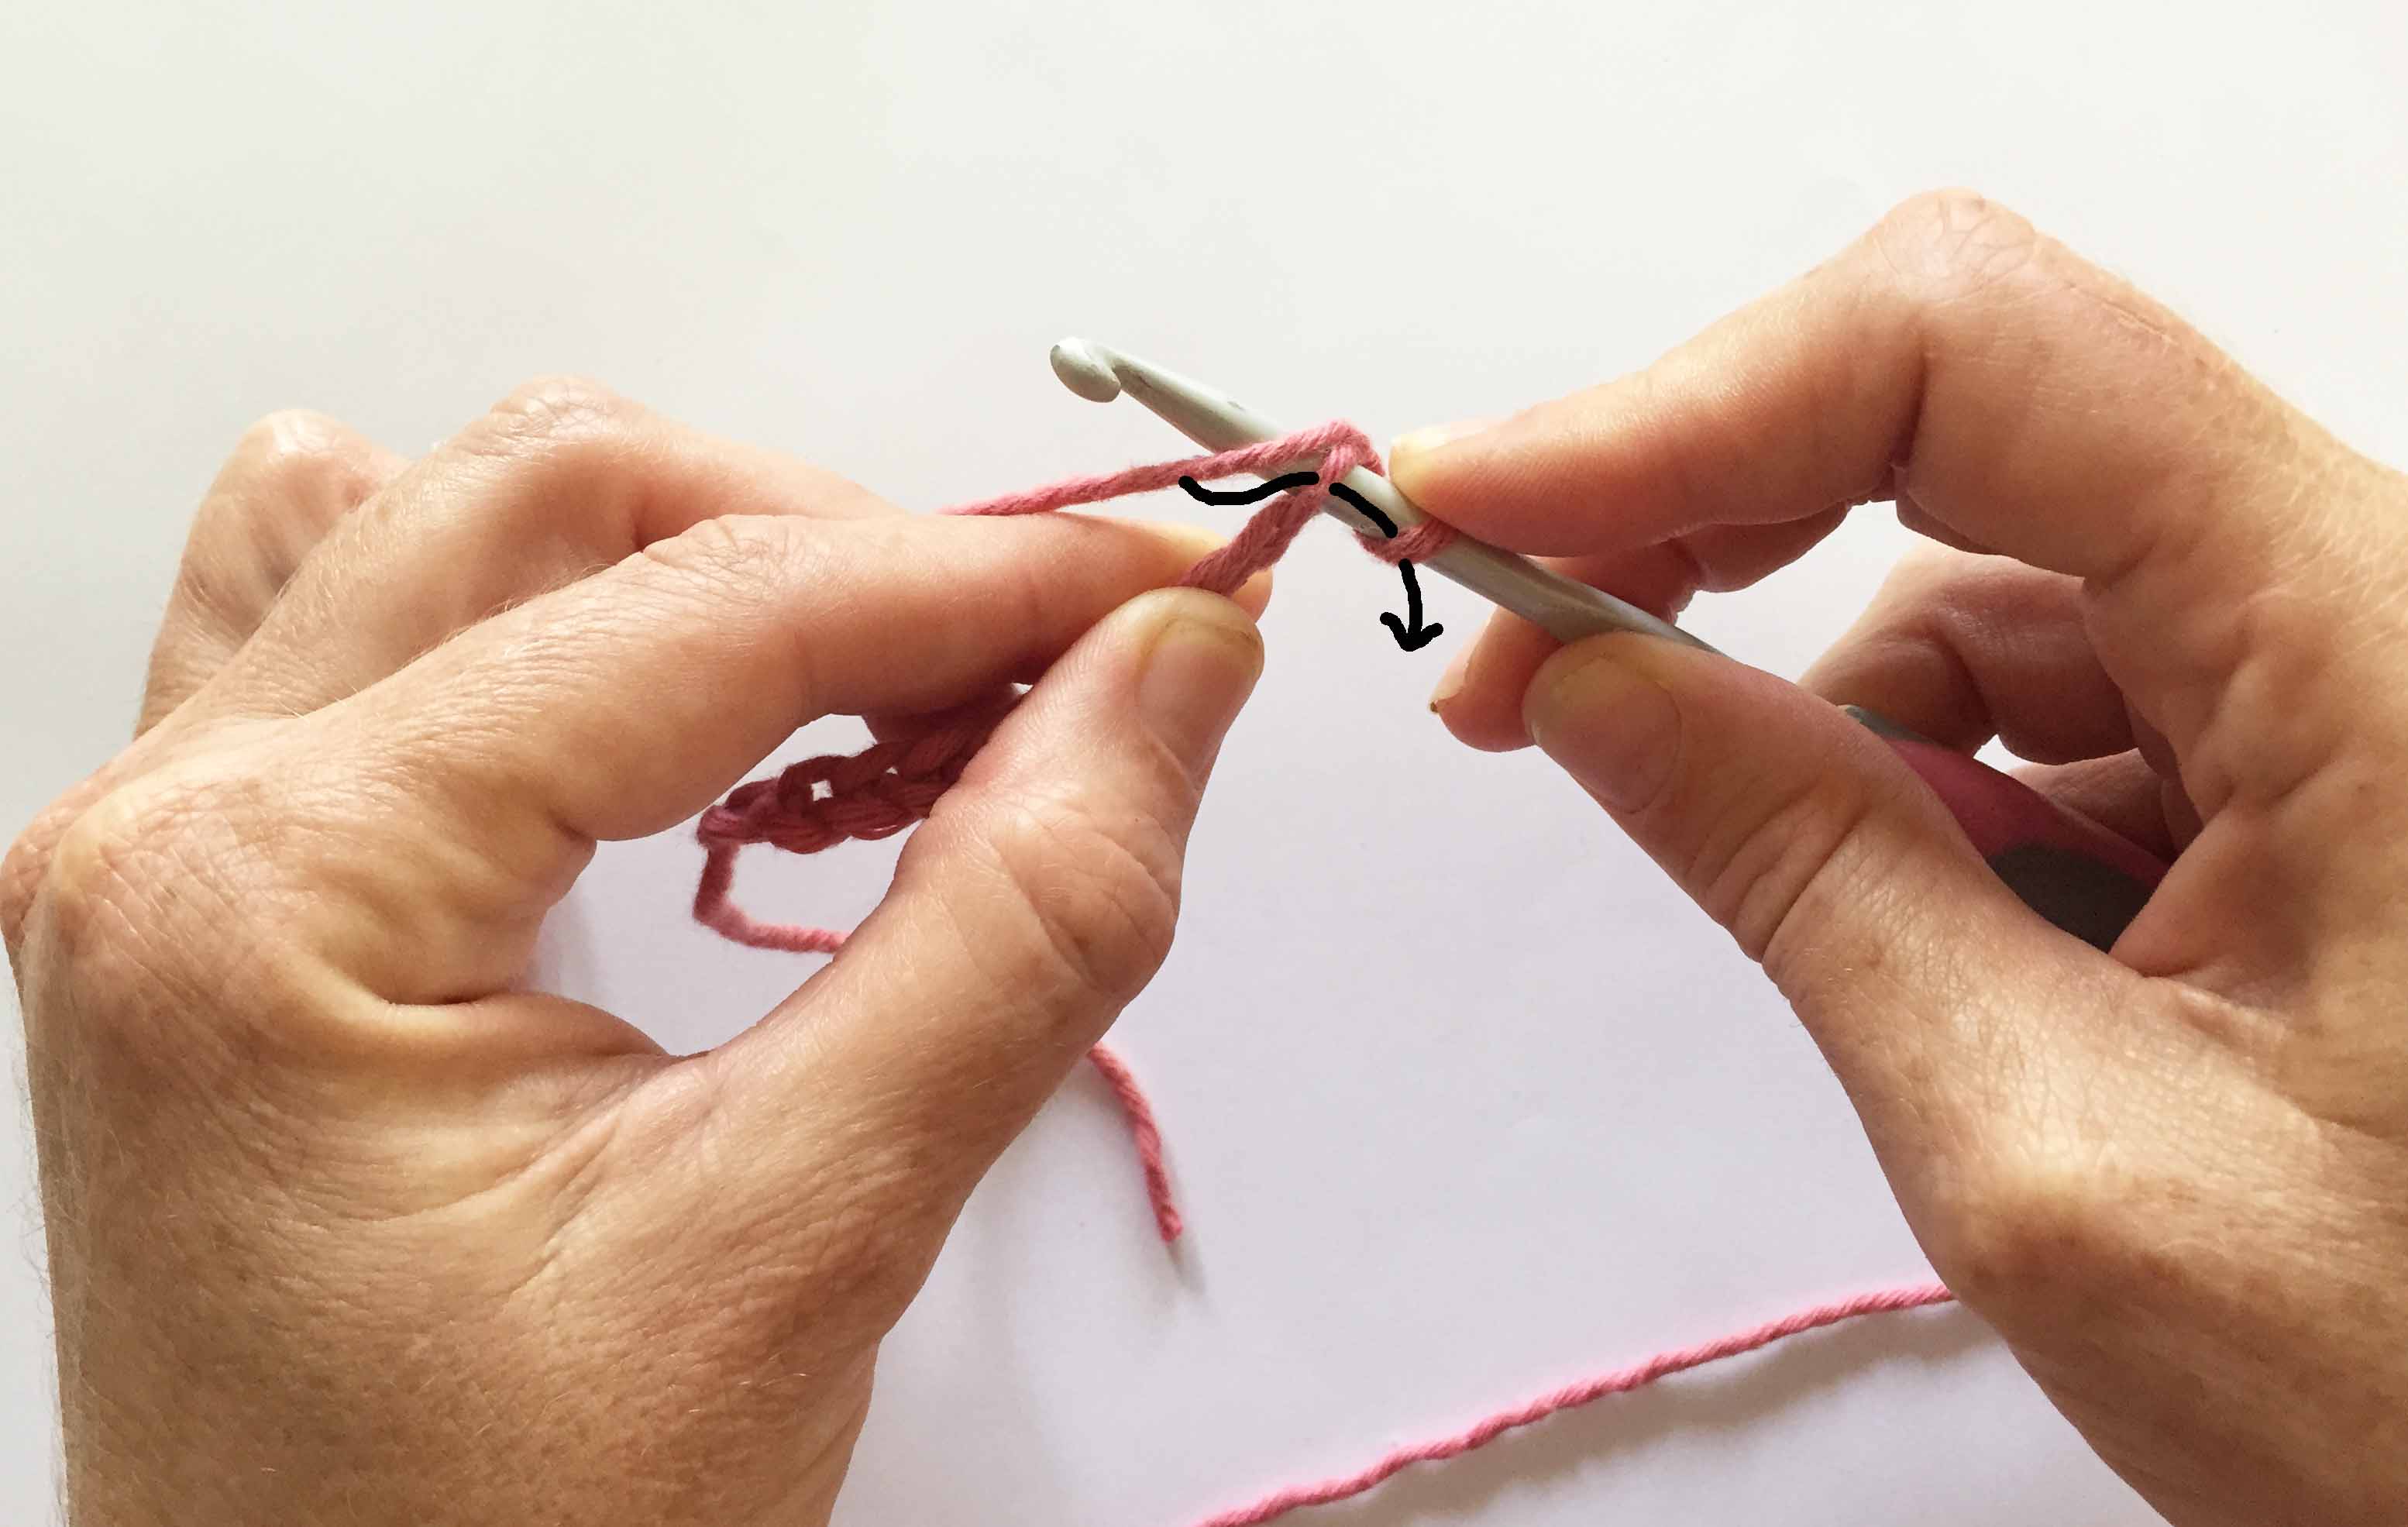
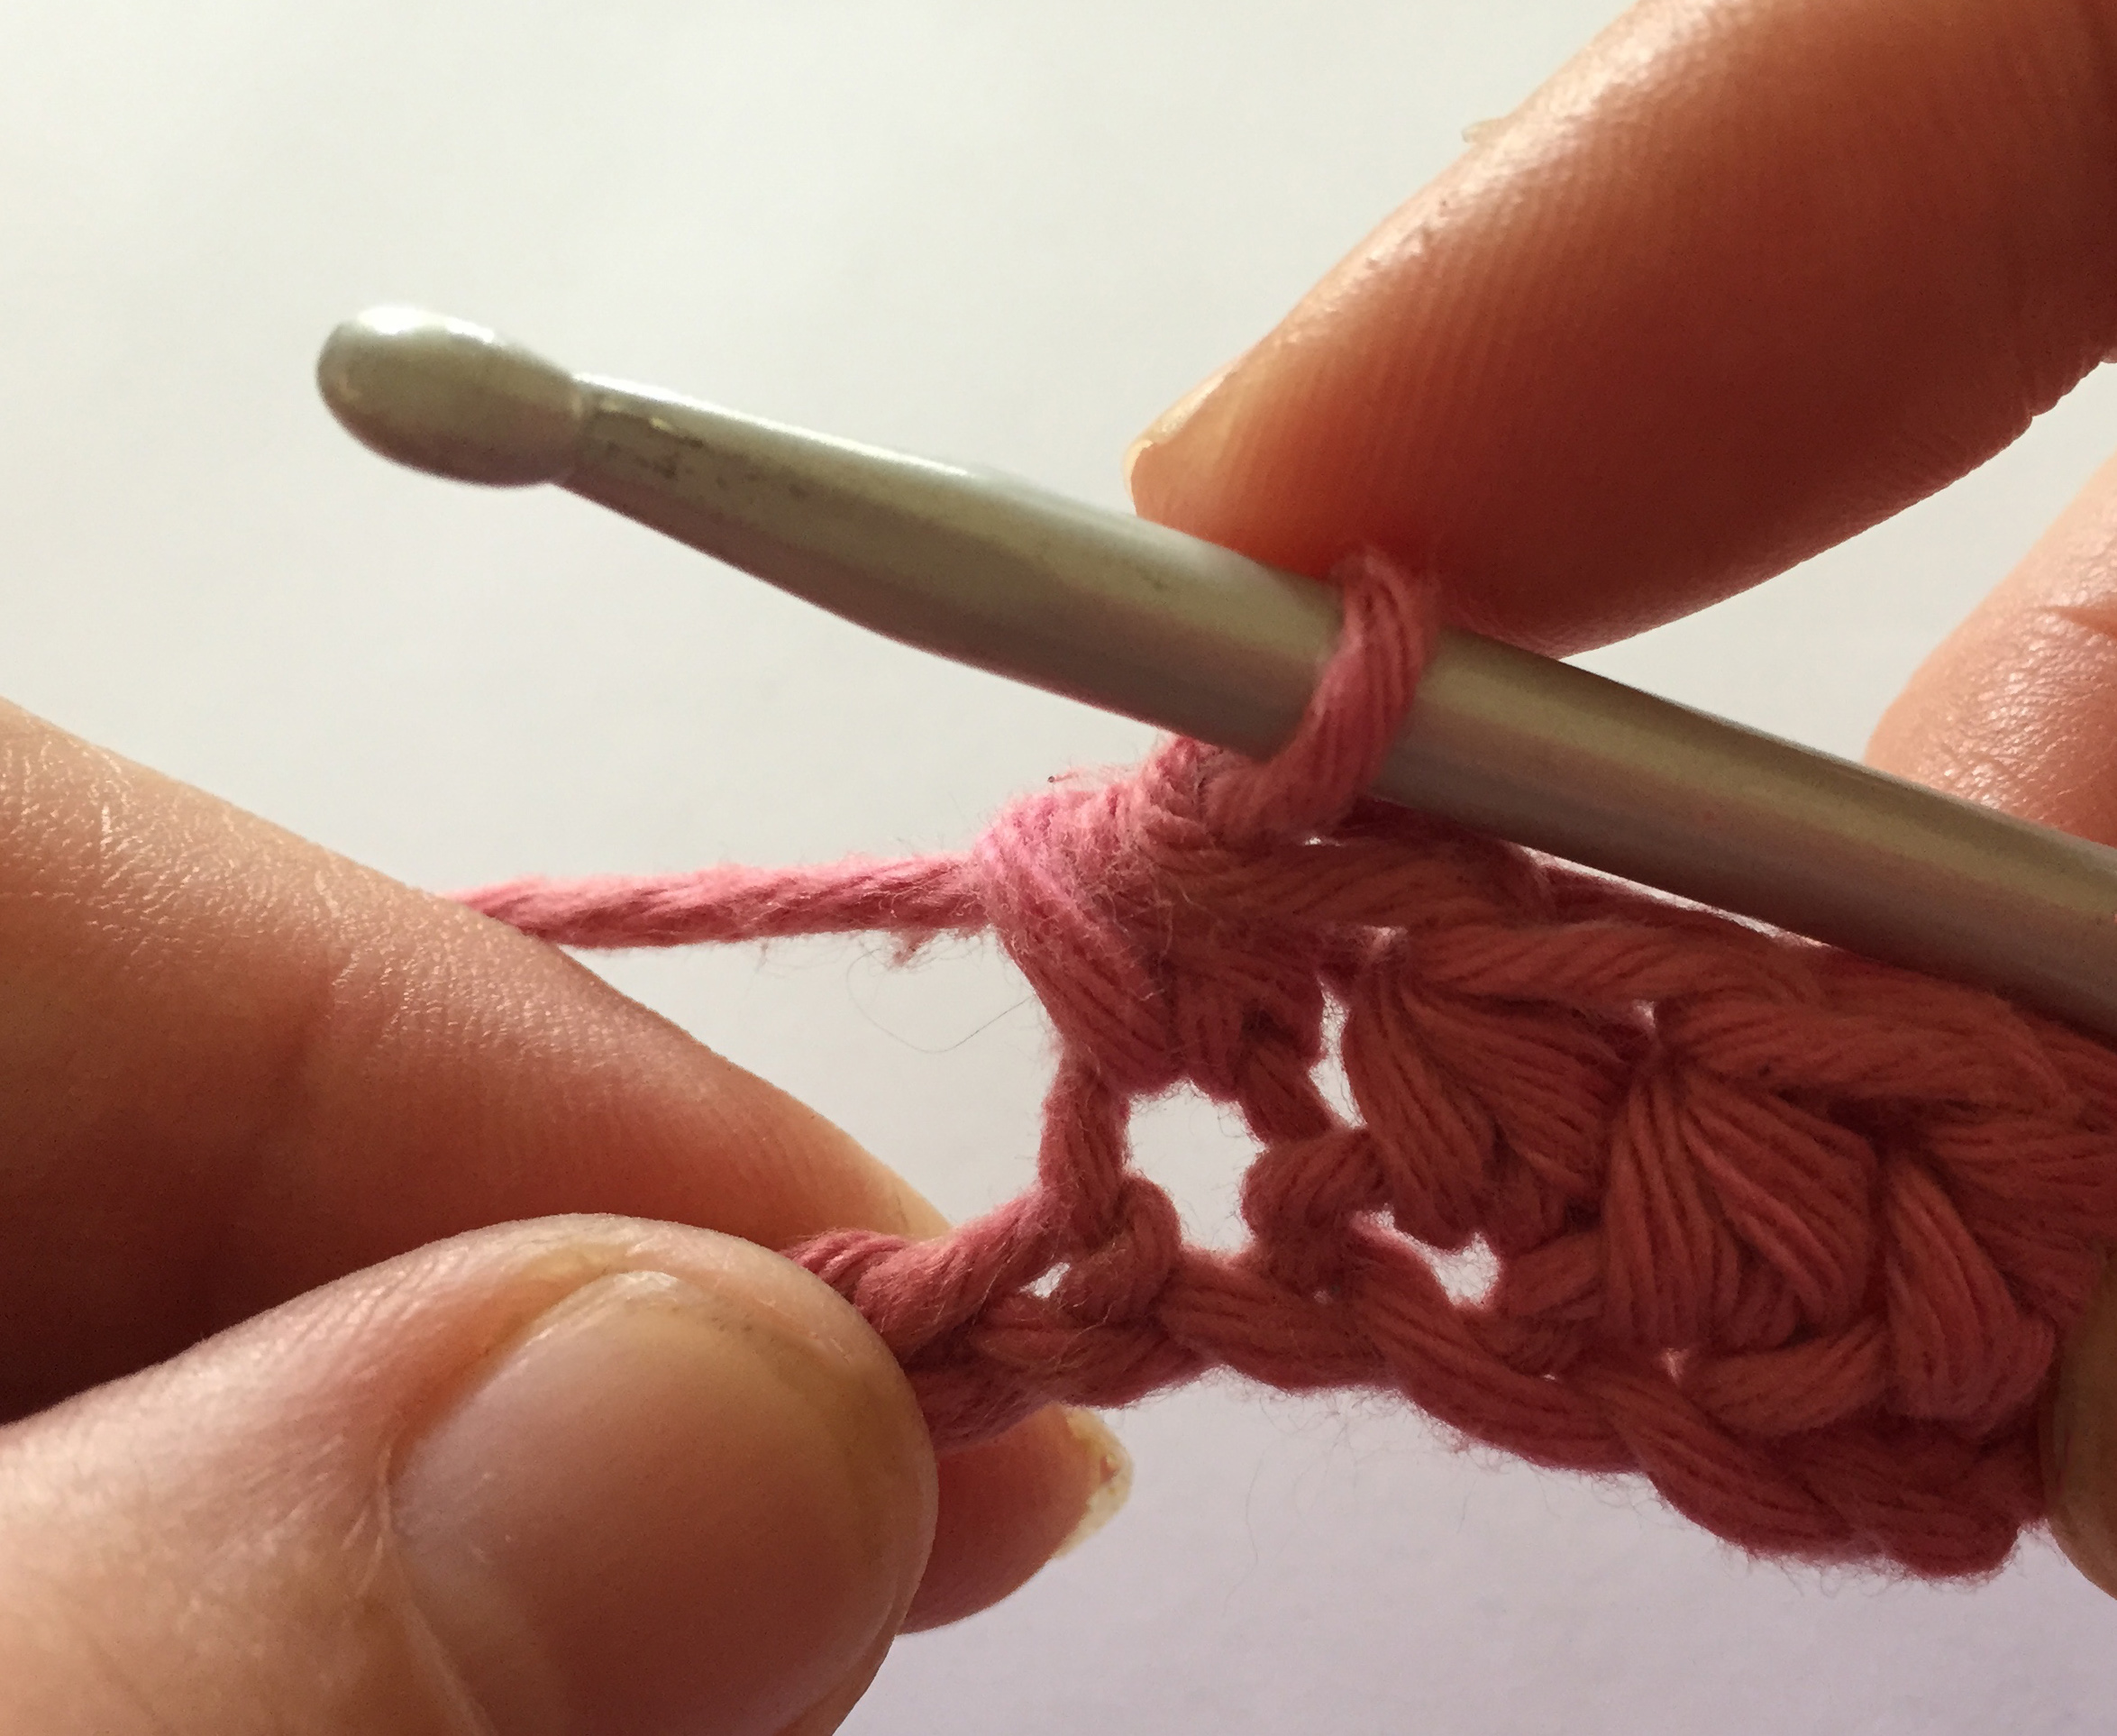
Please note: The new colour is always joined in the last dc of the group. You do not complete the dc, but leave the two last loops on the hook and complete it by bringing in the new colour. The old colour is carried behind the work and caught while you are working until needed again.
Abbreviations (American terminology)
beg = begin, ch = chain stitch, dc = double crochet, rnd = round, sp = space, ss = slip stitch, st = stitch
Diagram symbols
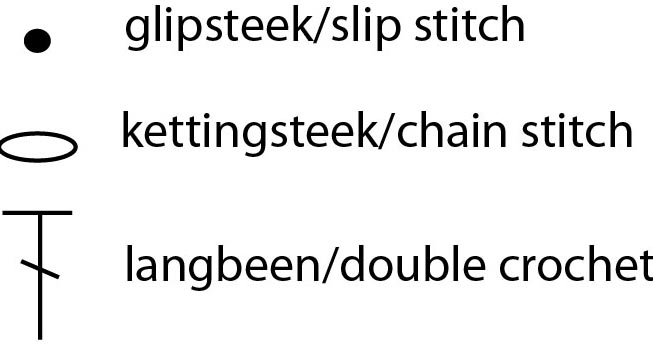
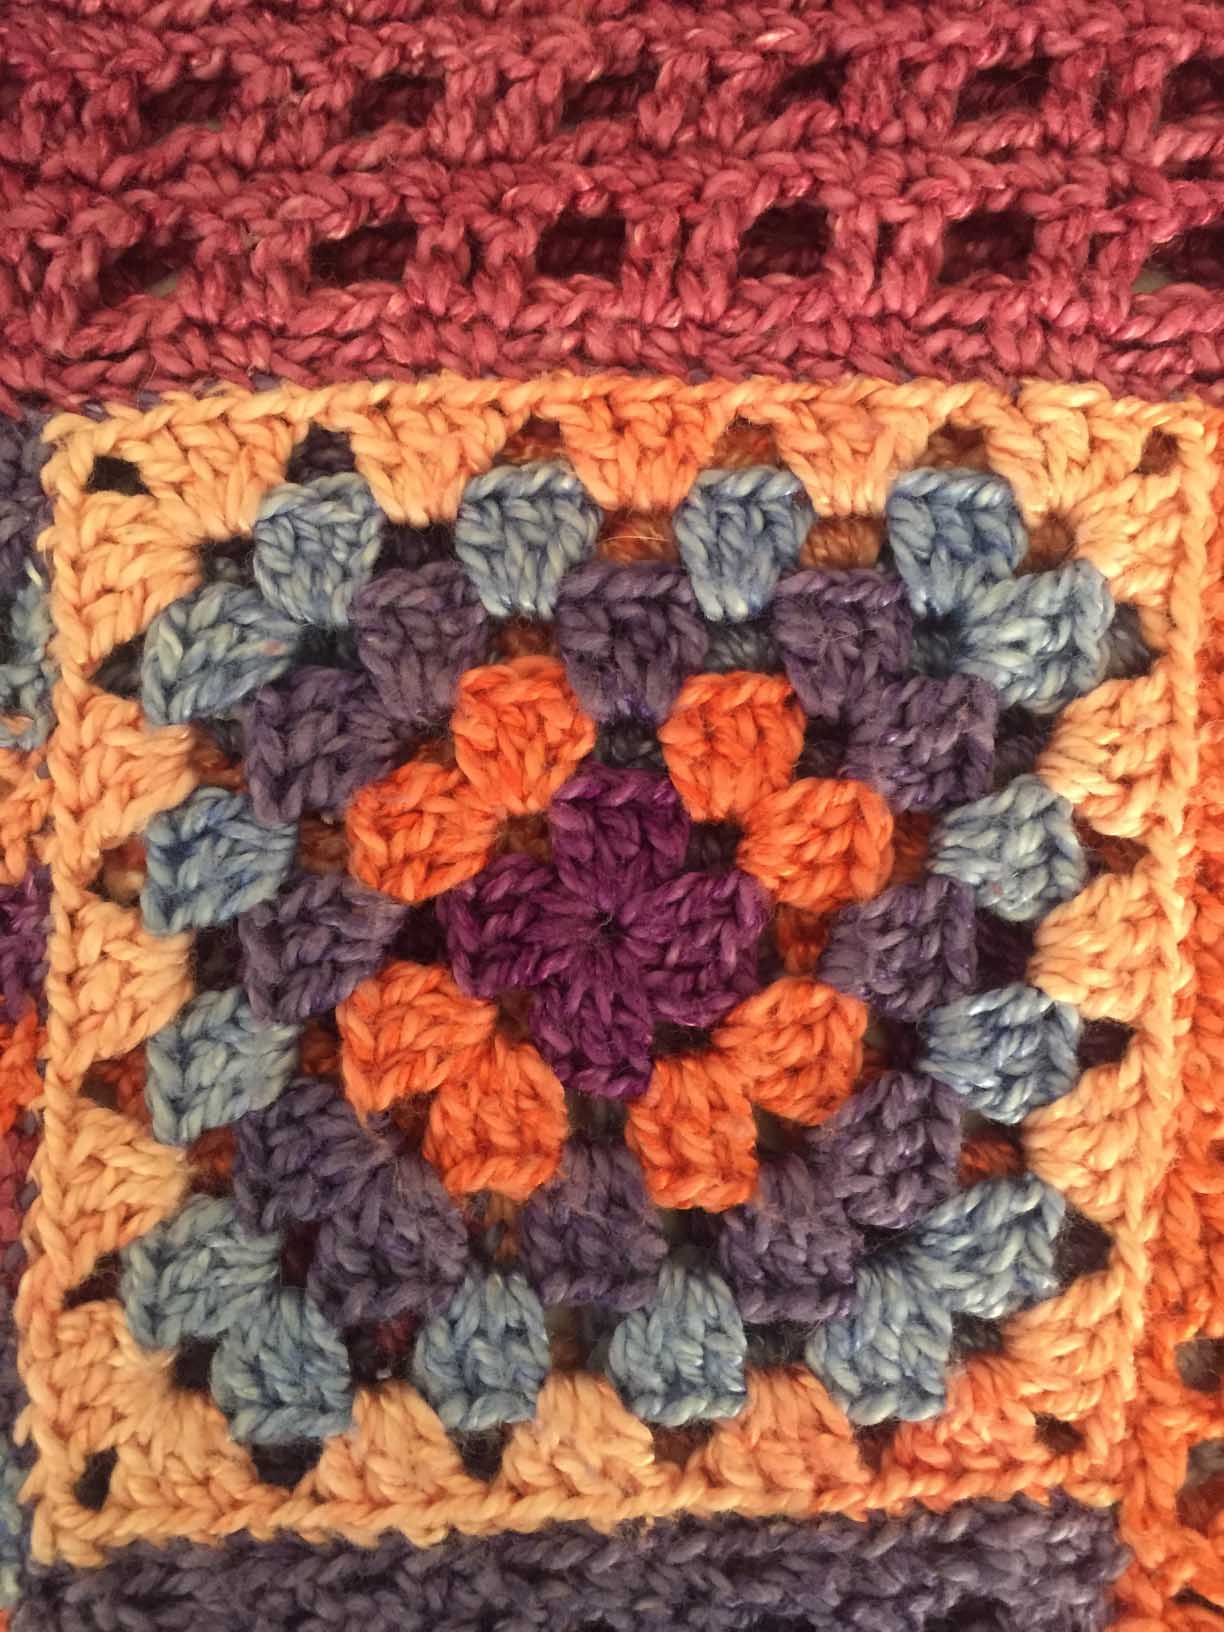
- Cross-boxes:
With Red and 3 mm hook, make 4 ch, ss in the 1st ch to form a ring.
Rnd 1: 3 ch, 2 dc, 3 ch, (3 dc, 3 ch) 3 times in ring, ss into top of beg-3 ch. Fasten off.
Rnd 2: with Blue; join in the 3 ch-sp, 3 ch, (2 dc, 2 ch, 3 dc) in the same sp, 1 ch, [(3 dc, 2 ch, 3 dc, 1 ch) in the next 3 ch-sp] 3 times, ss in top of beg-3 ch. Fasten off.
Rnd 3: with Green; join in the 2 ch-sp, 3 ch, (2 dc, 2 ch, 3 dc) in the same sp, change to Blue, 1 ch, 3 dc in the next 1 ch-sp, [change to Green, 1 ch, (3 dc, 2 ch, 3 dc) in the next 2 ch-sp, change to Blue, 1 ch, 3 dc in the next 1 ch-sp] 3 times, change to Green, 1 ch, ss in top of beg-3 ch.
Rnd 4: ss into the 2 ch-sp, 3 ch, (2 dc, 2 ch, 3 dc) in the same sp, change to Blue, (1 ch, 3 dc in the next 1 ch-sp) twice, [change to Green, 1 ch, (3 dc, 2 ch, 3 dc) in the next 2 ch-sp, change to Blue, (1 ch, 3 dc in the next 1 ch-sp) twice] 3 times, change to Green, 1 ch, ss in top of beg-3 ch. Fasten off.
Rnd 5: with Blue; join in the 2 ch-sp, 3 ch, (2 dc, 2 ch, 3 dc) in the same sp, change to Green, (1 ch, 3 dc in the next 1 ch-sp) 3 times, [change to Blue, 1 ch, (3 dc, 2 ch, 3 dc) in the next 2 ch-sp, change to Green, (1 ch, 3 dc in the next 1 ch-sp) 3 times] 3 times, change to Blue, 1 ch, ss in top of beg-3 ch.
Rnd 6: ss into the 2 ch-sp; 3 ch, (2 dc, 2 ch, 3 dc) in the same sp, change to Green, 1 ch, 3 dc in the next 1 ch-sp, change to Blue, (1 ch, 3 dc in the next 1 ch-sp) twice, change to Green, 1 ch, 3 dc in the next 1 ch-sp, [change to Blue, 1 ch, (3 dc, 2 ch, 3 dc) in the next 2 ch-sp, change to Green, 1 ch, 3 dc in the next 1 ch-sp, change to Blue, (1 ch, 3 dc in the next 1 ch-sp) twice, change to Green, 1 ch, 3 dc in the next 1 ch-sp] 3 times, change to Blue, 1 ch, ss in top of beg-3 ch. Fasten off.
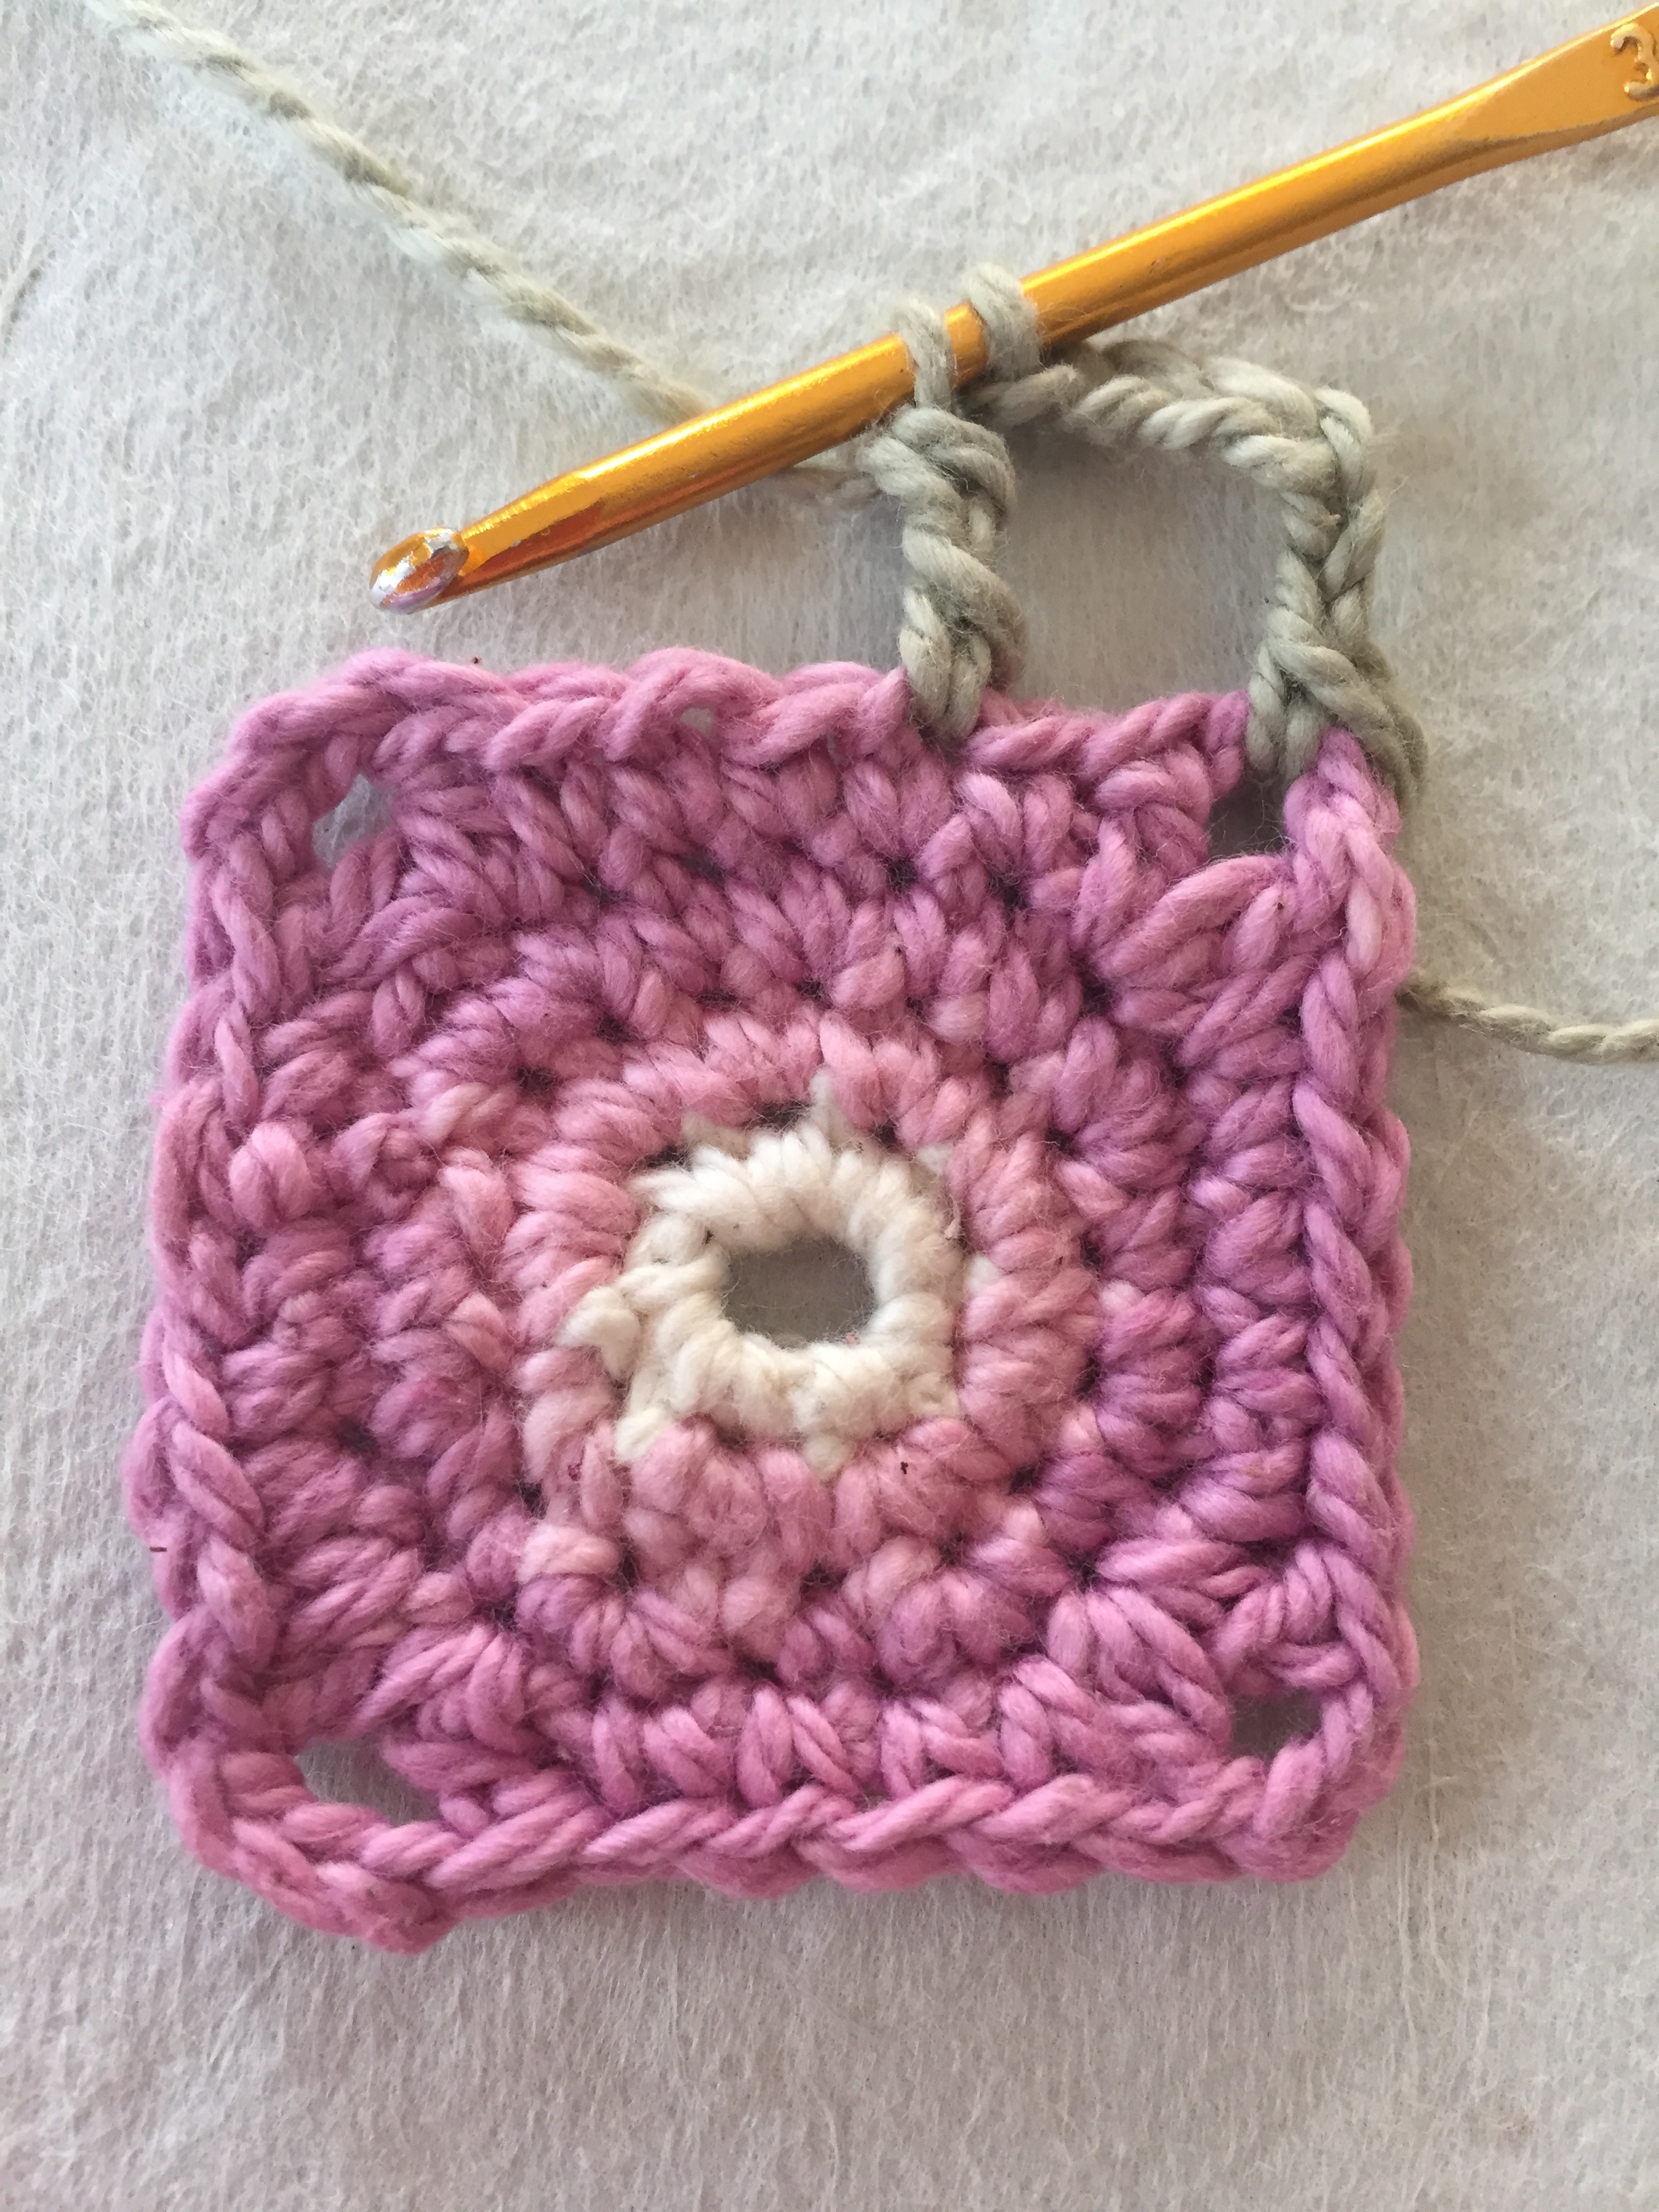
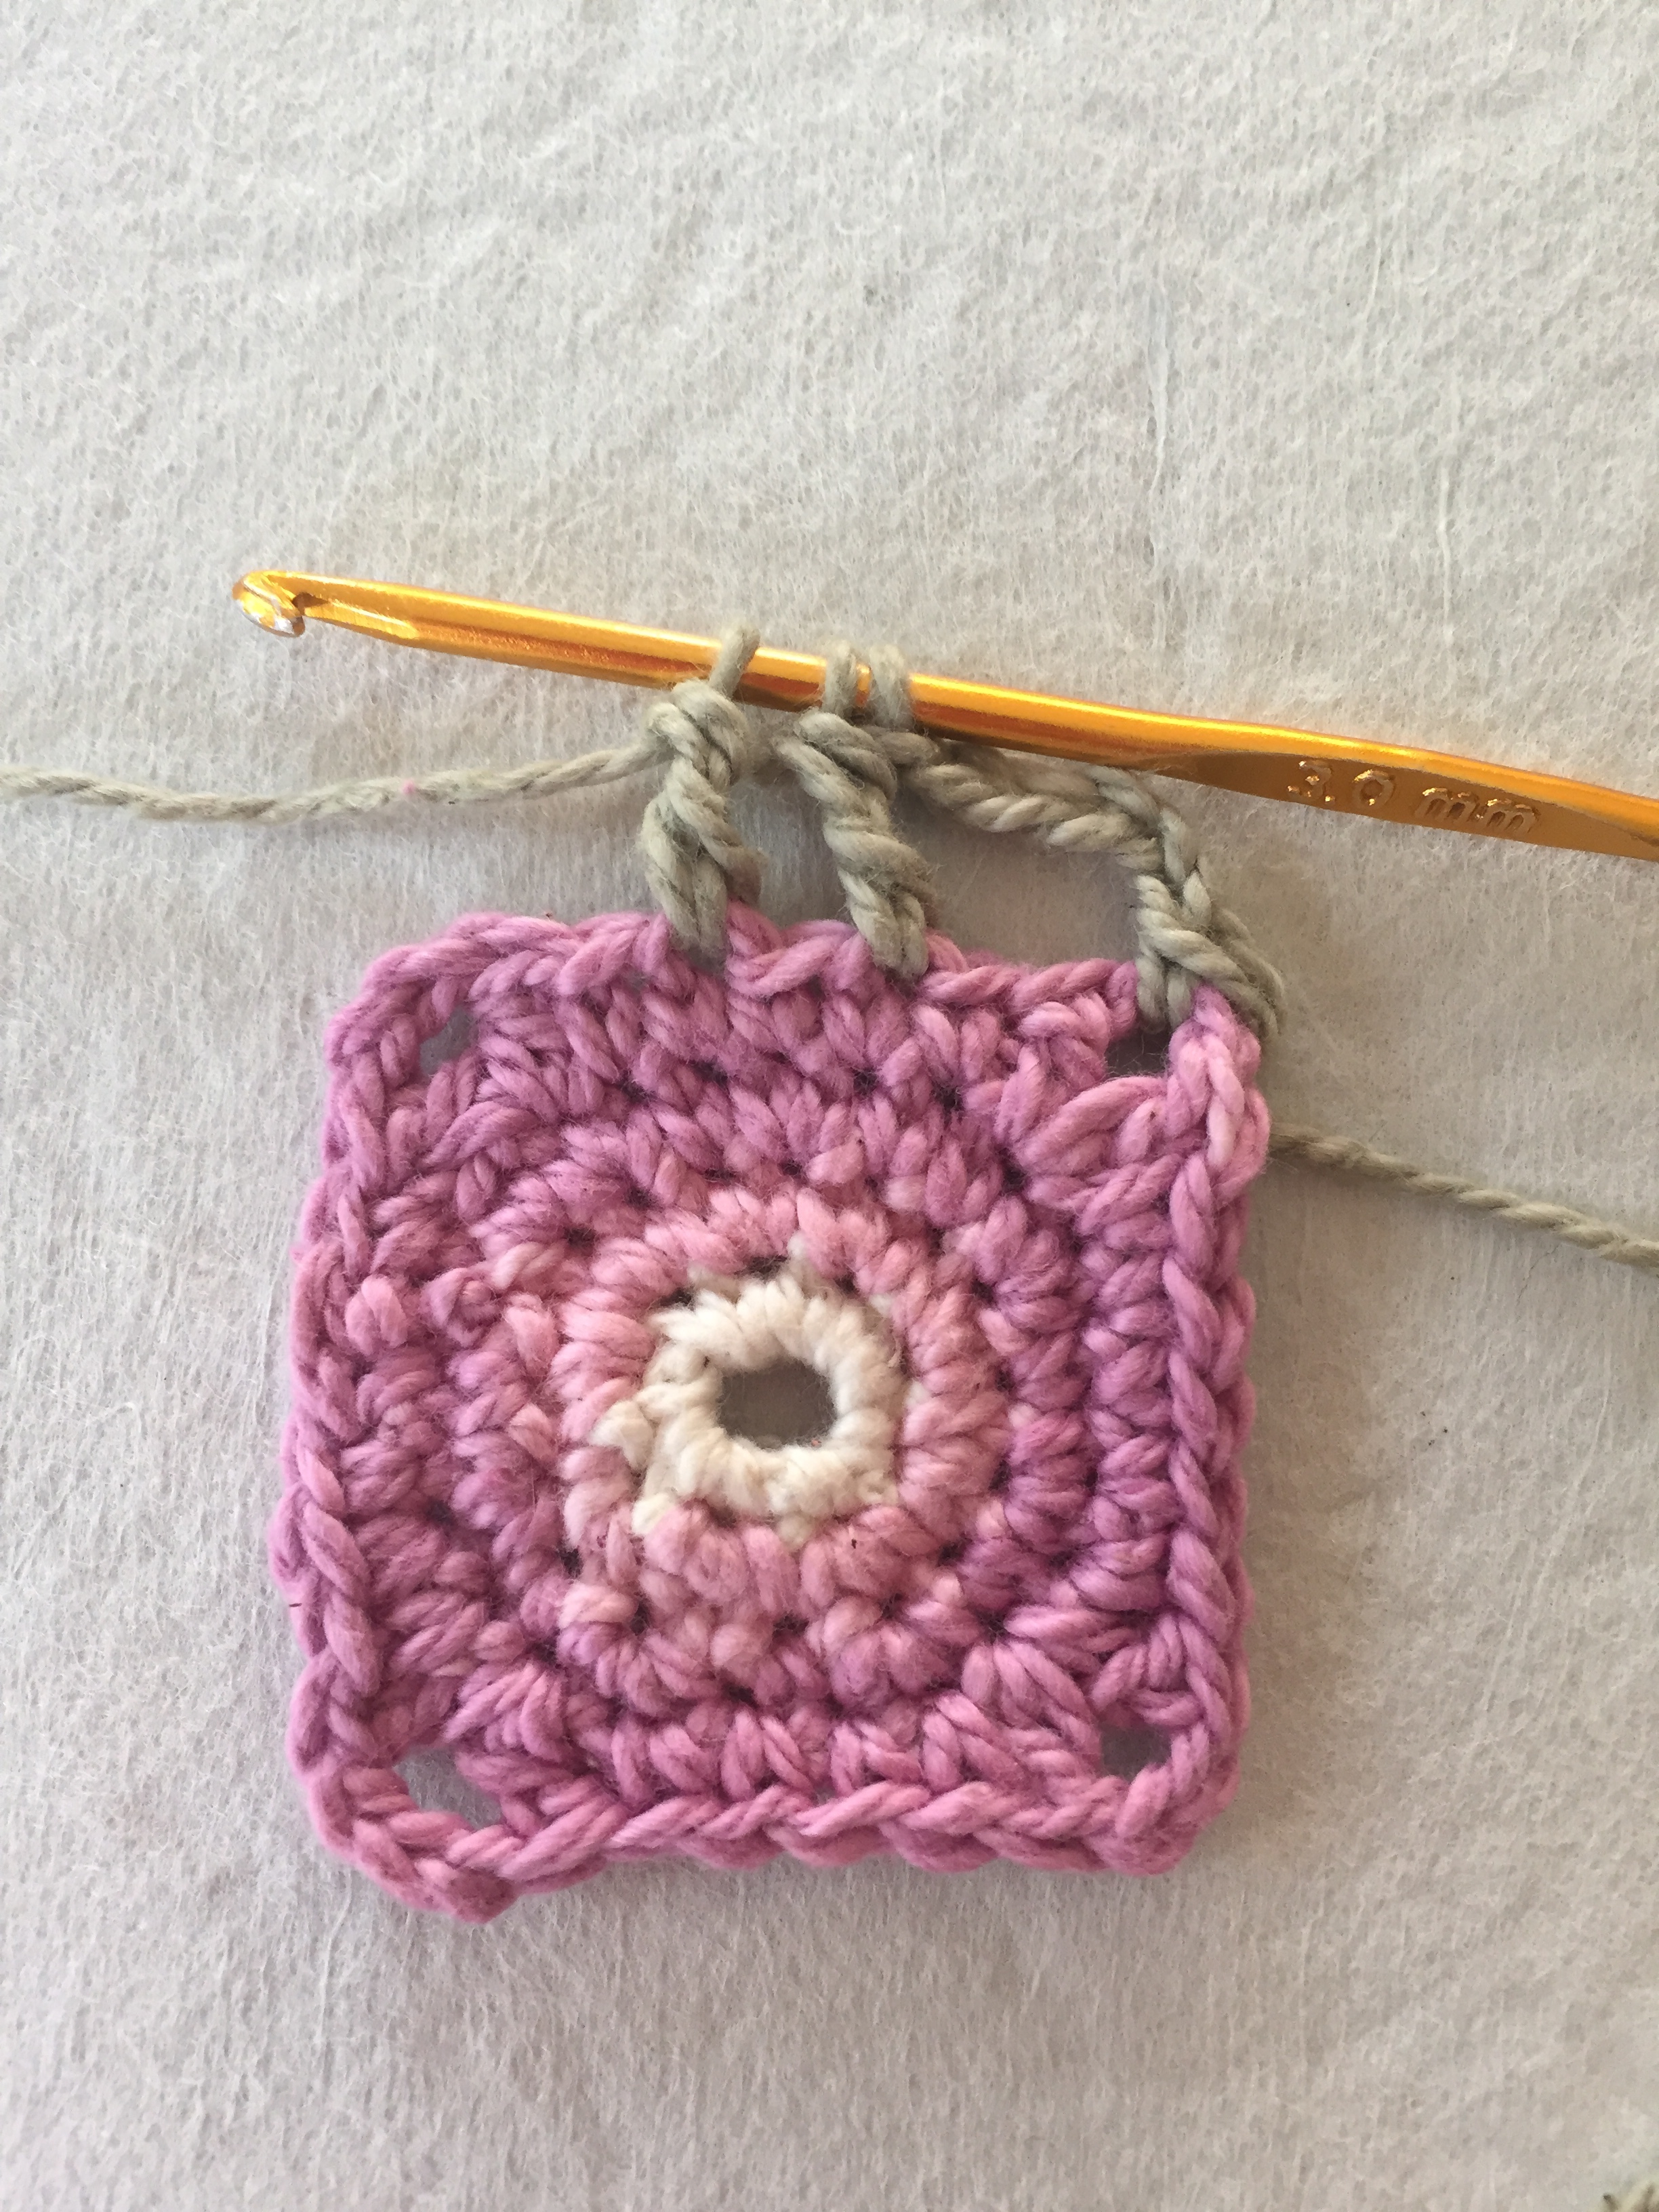
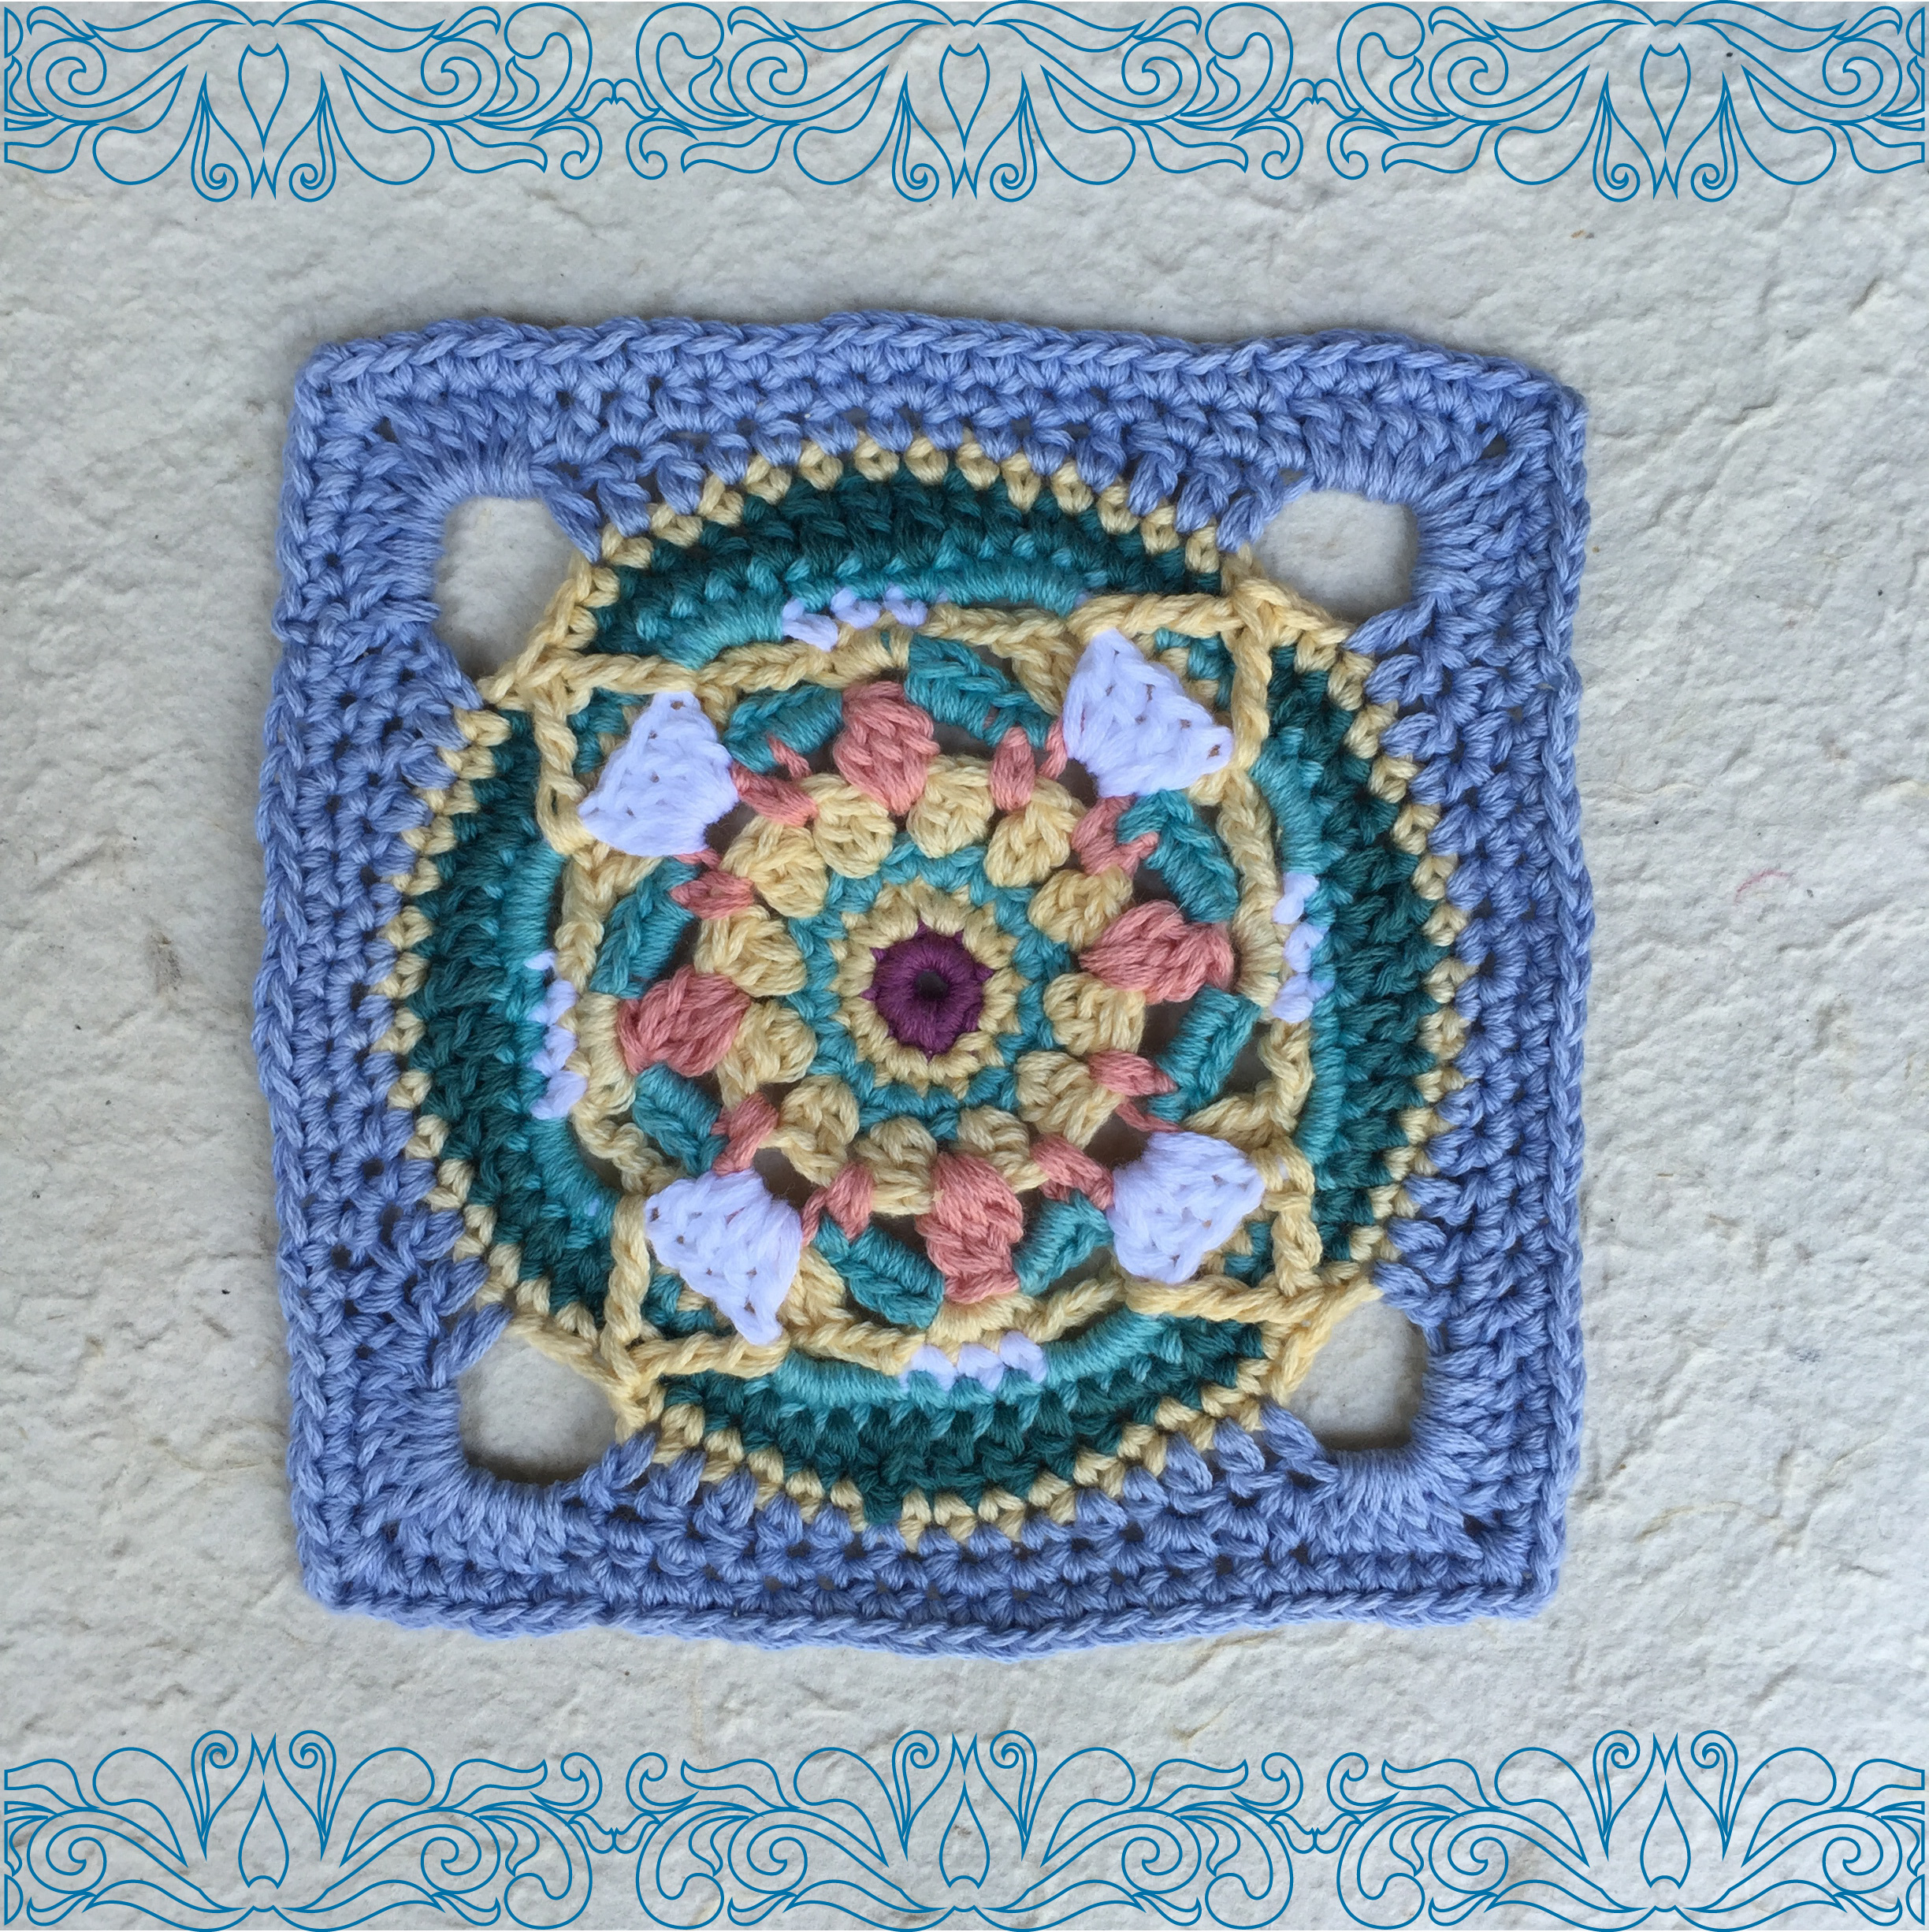
2. Flower chain
With Cream and 3 mm hook, make 4 ch, ss in the 1st ch to form a ring.
Rnd 1: 3 ch, 2 dc, 3 ch, (3 dc, 3 ch) 3 times in ring, ss into top of beg-3 ch. Fasten off.
Rnd 2: with Purple; join in the 3 ch-sp, 3 ch, (2 dc, 2 ch, 3 dc) in the same sp, 1 ch, [(3 dc, 2 ch, 3 dc, 1 ch) in the next 3 ch-sp] 3 times, ss into top of beg-3 ch. Fasten off.
Rnd 3: with Cream; join in the 2 ch-sp, 3 ch, (2 dc, 2 ch, 3 dc) in the same sp, change to Purple, 1 ch, 3 dc in the next 1 ch-sp, change to Cream, 1 ch, (3 dc, 2 ch, 3 dc) in the next 2 ch-sp, change to Pink, 1 ch, 3 dc in the next 1 ch-sp, change to Cream, 1 ch, (3 dc, 2 ch, 3 dc) in the next 2 ch-sp, change to Purple, 1 ch, 3 dc in the next 1 ch-sp, change to Cream, 1 ch, (3 dc, 2 ch, 3 dc) in the next 2 ch-sp, change to Pink, 1 ch, 3 dc in the next 1 ch-sp, change to Cream, 1 ch, ss into top of beg-3 ch.
Rnd 4: ss into the 2 ch-sp, 3 ch, (2 dc, 2 ch, 3 dc) in the same sp, (1 ch, 3 dc in the next 1 ch-sp) twice, 1 ch, (3 dc, 2 ch, 3 dc) in the next 2 ch-sp, change to Pink, (1 ch, 3 dc in the next 1 ch-sp) twice, change to Cream, 1 ch, (3 dc, 2 ch, 3 dc) in the next 2 ch-sp, (1 ch, 3 dc in the next 1 ch-sp) twice, 1 ch, (3 dc, 2 ch, 3 dc) in the next 2 ch-sp, change to Pink, (1 ch, 3 dc in the next 1 ch-sp) twice, change to Cream, 1 ch, ss into top of beg-3 ch.
Rnd 5: ss into the 2 ch-sp, 3 ch, (2 dc, 2 ch, 3 dc) in the same sp, 1 ch, 3 dc in the next 1 ch-sp, change to Purple, 1 ch, 3 dc in the next 1 ch-sp, change to Cream, 1 ch, 3 dc in the next 1 ch-sp, 1 ch, (3 dc, 2 ch, 3 dc) in the next 2 ch-sp, 1 ch, 3 dc in the next 1 ch-sp, change to Pink, 1 ch, 3 dc in the next 1 ch-sp, change to Cream, 1 ch, 3 dc in the next 1 ch-sp, 1 ch, (3 dc, 2 ch, 3 dc) in the next 2 ch-sp, 1 ch, 3 dc in the next 1 ch-sp, change to Purple, 1 ch, 3 dc in the next 1 ch-sp, change to Cream, 1 ch, 3 dc in the next 1 ch-sp, 1 ch, (3 dc, 2 ch, 3 dc) in the next 2 ch-sp, 1 ch, 3 dc in the next 1 ch-sp, change to Pink, 1 ch, 3 dc in the next 1 ch-sp, change to Cream, 1 ch, 3 dc in the next 1 ch-sp, 1 ch, ss intop top of beg-3 ch. Fasten off.
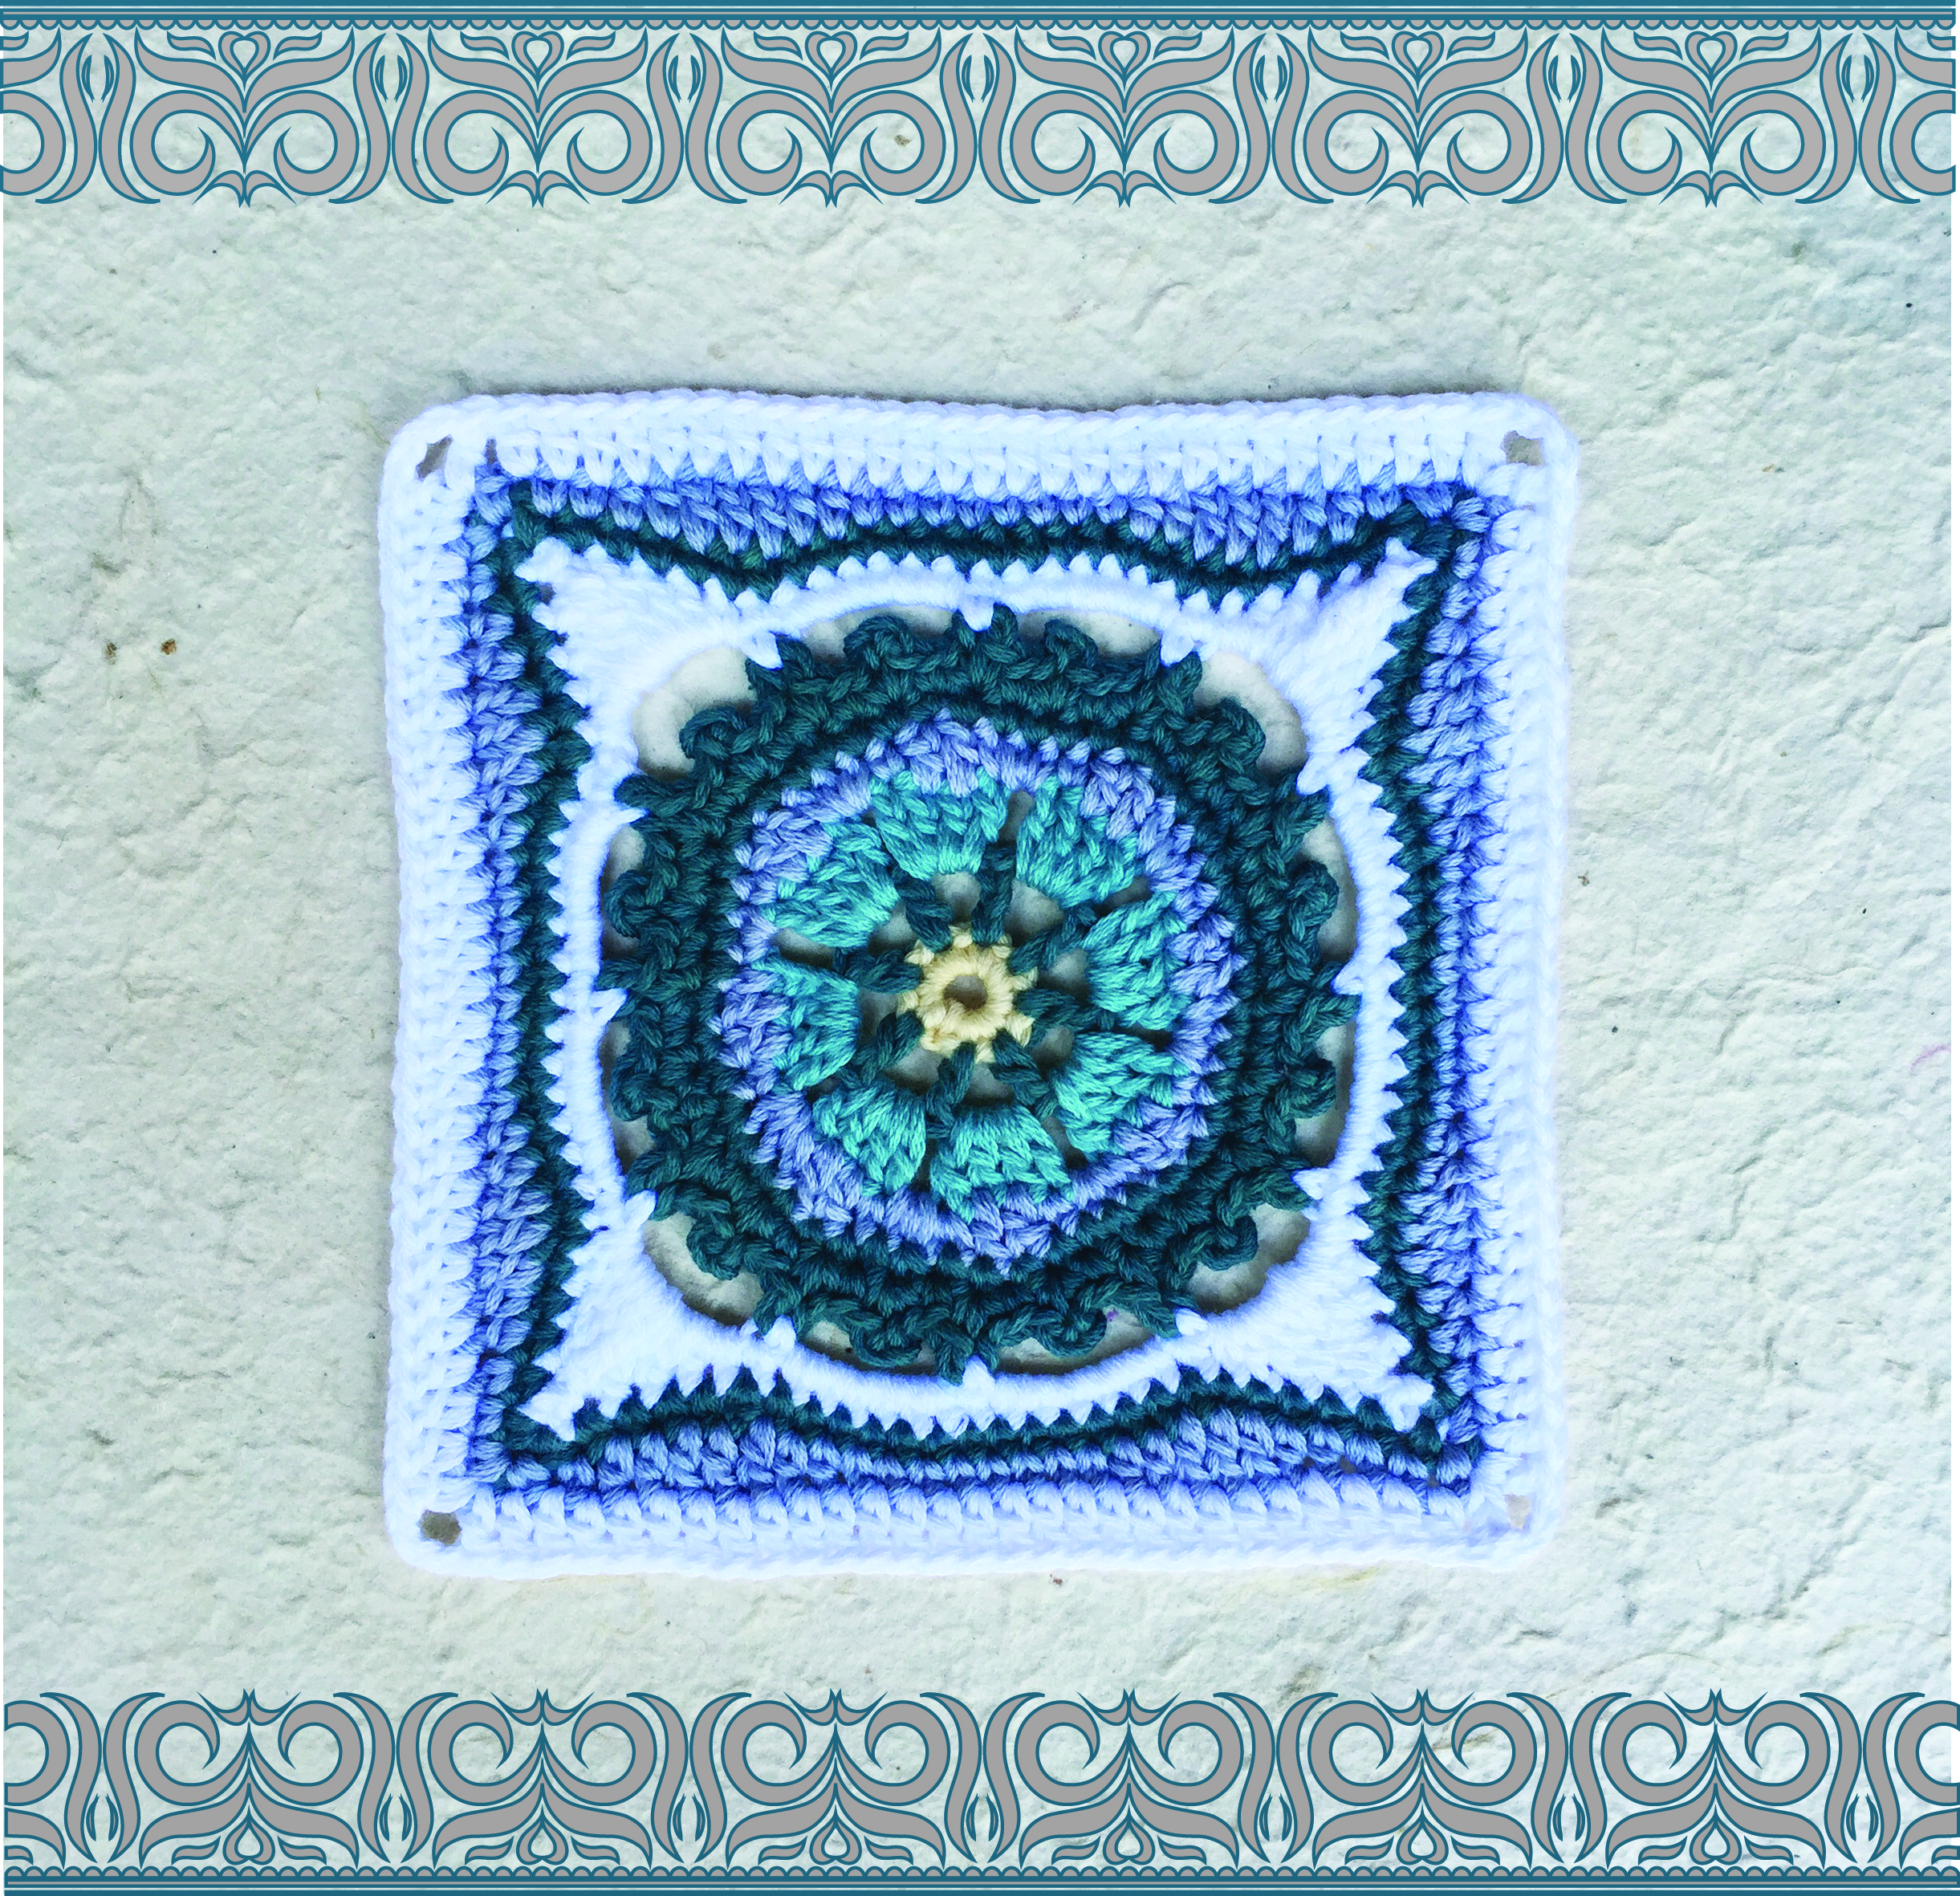
3. Tic-tac-toe
With Blue and 3 mm hook, make 4 ch, ss in the 1st ch to form a ring.
Rnd 1: 3 ch, 2 dc, 3 ch, (3 dc, 3 ch) 3 times in ring, ss into top of beg-3 ch. Fasten off.
Rnd 2: with Green; join in the 3 ch-sp, 3 ch, (2 dc, 2 ch, 3 dc) in the same sp, 1 ch, [(3 dc, 2 ch, 3 dc, 1 ch) in the next 3 ch-sp] 3 times, ss into top of beg-3 ch. Fasten off.
Rnd 3: with Pink; join in the 2 ch-sp, 3 ch, (2 dc, 2 ch, 3 dc) in the same sp, change to Green, 1 ch, 3 dc in the next 1 ch-sp, [change to Pink, 1 ch, (3 dc, 2 ch, 3 dc) in the next 2 ch-sp, change to Green, 1 ch, 3 dc in the next 1 ch-sp] 3 times, change to Pink, 1 ch, ss into top of beg-3 ch.
Rnd 4: ss into the 2 ch-sp, 3 ch, (2 dc, 2 ch, 3 dc) in the same sp, change to Green, (1 ch, 3 dc in the next 1 ch-sp) twice, [change to Pink, 1 ch, (3 dc, 2 ch, 3 dc) in the next 2 ch-sp, change to Green, (1 ch, 3 dc in the next 1 ch-sp) twice] 3 times, change to Pink, 1 ch, ss into top of beg-3 ch.
Rnd 5: ss into the 2 ch-sp, 3 ch, (2 dc, 2 ch, 3 dc) in the same sp, change to Green, 1 ch, 3 dc in the next 1 ch-sp, change to Blue, 1 ch, 3 dc in the next 1 ch-sp, change to Green, 1 ch, 3 dc in the next 1 ch-sp, [change to Pink, 1 ch, (3 dc, 2 ch, 3 dc) in the next 2 ch-sp, change to Green, 1 ch, 3 dc in the next 1 ch-sp, change to Blue, 1 ch, 3 dc in the next 1 ch-sp, change to Green, 1 ch, 3 dc in the next 1 ch-sp] 3 times, change to Pink, 1 ch, ss into top of beg-3 ch. Fasten off.
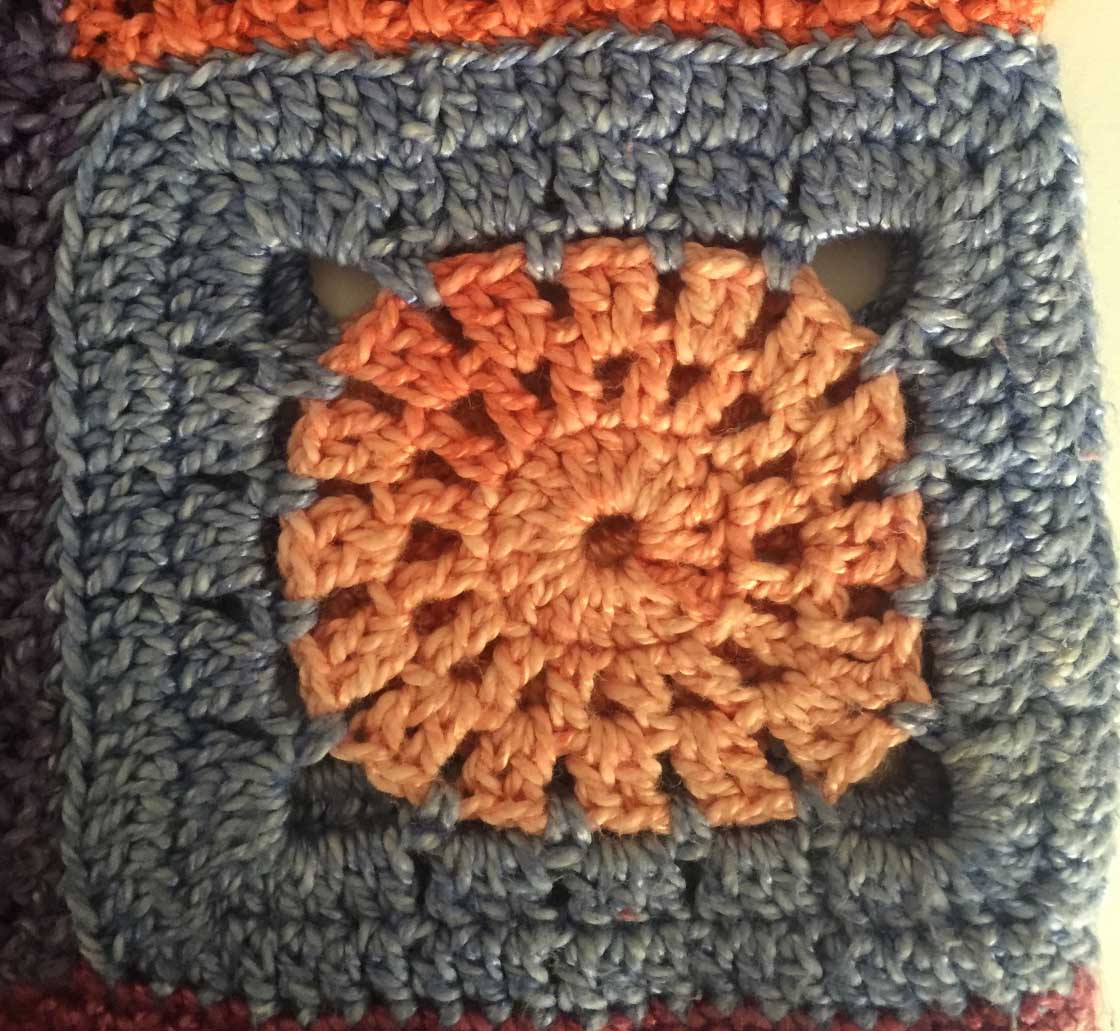
4. Diagonal boxes:

Processed with MOLDIV

Processed with MOLDIV
With Cream and 3 mm hook, make 4 ch, ss in the 1st ch to form a ring.
Rnd 1: 3 ch, 2 dc, 3 ch, (3 dc, 3 ch) 3 times in ring, ss into top of beg-3 ch. Fasten off.
Rnd 2: with Blue; join in the 3 ch-sp, 3 ch, (2 dc, 2 ch, 3 dc) in the same sp, change to Cream, 1 ch, (3 dc, 2 ch, 3 dc) in the next 3 ch-sp, change to Blue, 1 ch, (3 dc, 2 ch, 3 dc) in the next 3 ch-sp, change to Cream, 1 ch, (3 dc, 2 ch, 3 dc) in the next 3 ch-sp, change to Blue, 1 ch, ss into top of beg-3 ch. Fasten off.
Rnd 3: with Cream; join in the 2 ch-sp, 3 ch, (2 dc, 2 ch, 3 dc) in the same sp, change to Blue, 1 ch, 3 dc in the next 1 ch-sp, [change to Cream, 1 ch, (3 dc, 2 ch, 3 dc) in the next 2 ch-sp, change to Blue, 1 ch, 3 dc in the next 1 ch-sp] 3 times, change to Cream, 1 ch, ss into top of beg-3 ch.
Rnd 4: ss into the 2 ch-sp, 3 ch, (2 dc, 2 ch, 3 dc) in the same sp, 1 ch, 3 dc in the next 1 ch-sp, change to Blue, 1 ch, 3 dc in the next 1 ch-sp, 1 ch, (3 dc, 2 ch, 3 dc) in the next 2 ch-sp, 1 ch, 3 dc in the next 1 ch-sp, change to Cream, 1 ch, 3 dc in the next 1 ch-sp, 1 ch, (3 dc, 2 ch, 3 dc) in the next 2 ch-sp, 1 ch, 3 dc in the next 1 ch-sp, change to Blue, 1 ch, 3 dc in the next 1 ch-sp, 1 ch, (3 dc, 2 ch, 3 dc) in the next 2 ch-sp, 1 ch, 3 dc in the next 1 ch-sp, change to Cream, 1 ch, 3 dc in the next 1 ch-sp, 1 ch, ss intop top of beg-3 ch. Fasten off.
Rnd 5: with Turquoise; join in the 2 ch-sp; 3 ch, (2 dc, 2 ch, 3 dc) in the same sp, change to Cream, (1 ch, 3 dc in the next 1 ch-sp) twice, change to Blue, 1 ch, 3 dc in the next 1 ch-sp, change to Cream, 1 ch, (3 dc, 2 ch, 3 dc) in the next 2 ch-sp, change to Blue, 1 ch, 3 dc in the next 1 ch-sp, change to Cream, (1 ch, 3 dc in the next 1 ch-sp) twice, change to Turquoise, (3 dc, 2 ch, 3 dc) in the next 2 ch-sp, change to Cream, (1 ch, 3 dc in the next 1 ch-sp) twice, change to Blue, 1 ch, 3 dc in the next 1 ch-sp, change to Cream, 1 ch, (3 dc, 2 ch, 3 dc) in the next 2 ch-sp, change to Blue, 1 ch, 3 dc in the next 1 ch-sp, change to Cream, (1 ch, 3 dc in the next 1 ch-sp) twice, change to Turquoise, 1 ch, ss into top of beg-3 ch.
Rnd 6: ss into the 2 ch-sp; 3 ch, (2 dc, 2 ch, 3 dc) in the same sp, 1 ch, 3 dc in the next 1 ch-sp, change to Cream, (1 ch, 3 dc in the next 1 ch-sp) twice, change to Blue, 1 ch, 3 dc in the next 1 ch-sp, change to Cream, 1 ch, (3 dc, 2 ch, 3 dc) in the next 2 ch-sp, change to Blue, 1 ch, 3 dc in the next 1 ch-sp, change to Cream, (1 ch, 3 dc in the next 1 ch-sp) twice, change to Turquoise, 1 ch, 3 dc in the next 1 ch-sp, 1 ch, (3 dc, 2 ch, 3 dc) in the next 2 ch-sp, 1 ch, 3 dc in the next 1 ch-sp, change to Cream, (1 ch, 3 dc in the next 1 ch-sp) twice, change to Blue, 1 ch, 3 dc in the next 1 ch-sp, change to Cream, 1 ch, (3 dc, 2 ch, 3 dc) in the next 2 ch-sp, change to Blue, 1 ch, 3 dc in the next 1 ch-sp, change to Cream, (1 ch, 3 dc in the next 1 ch-sp) twice, change to Turquoise, 1 ch, 3 dc in the next 1 ch-sp, 1 ch, ss intop top of beg-3 ch. Fasten off.
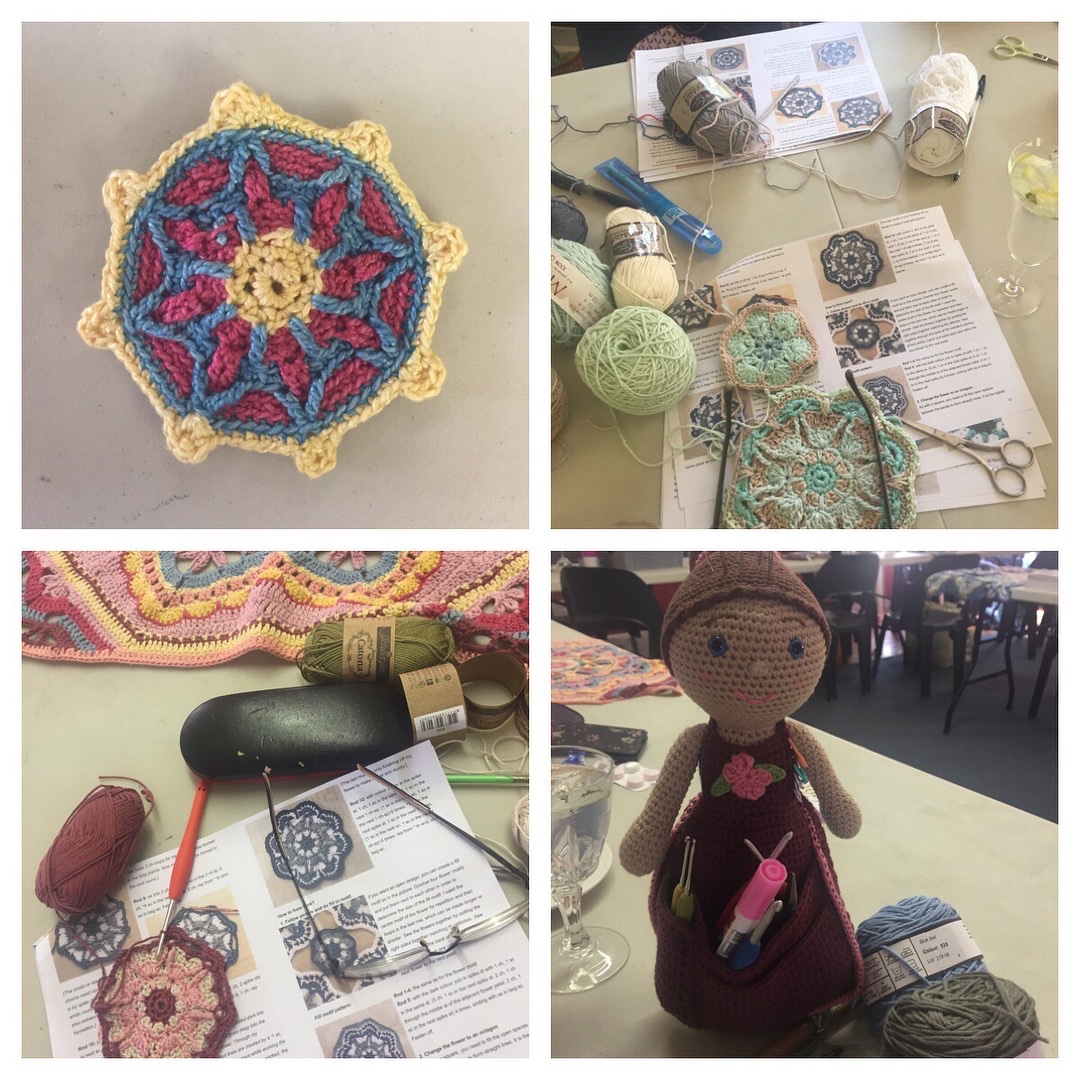
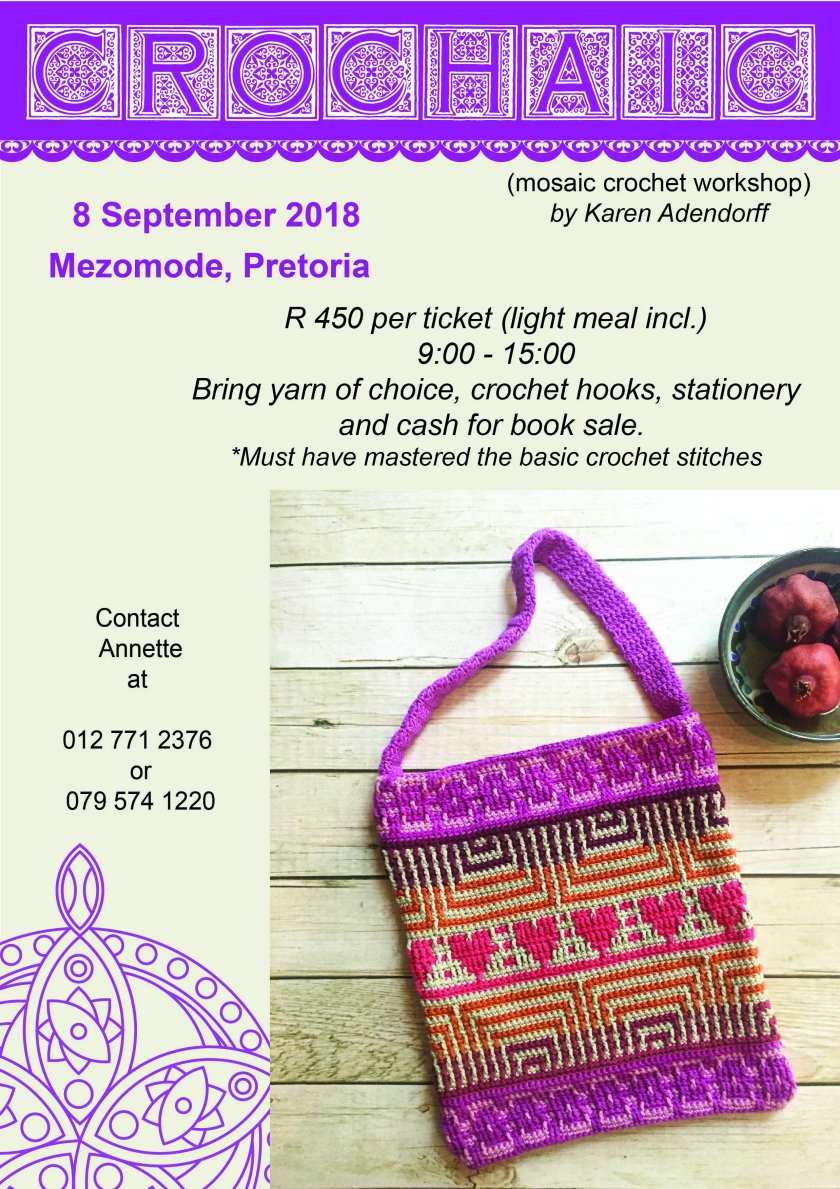
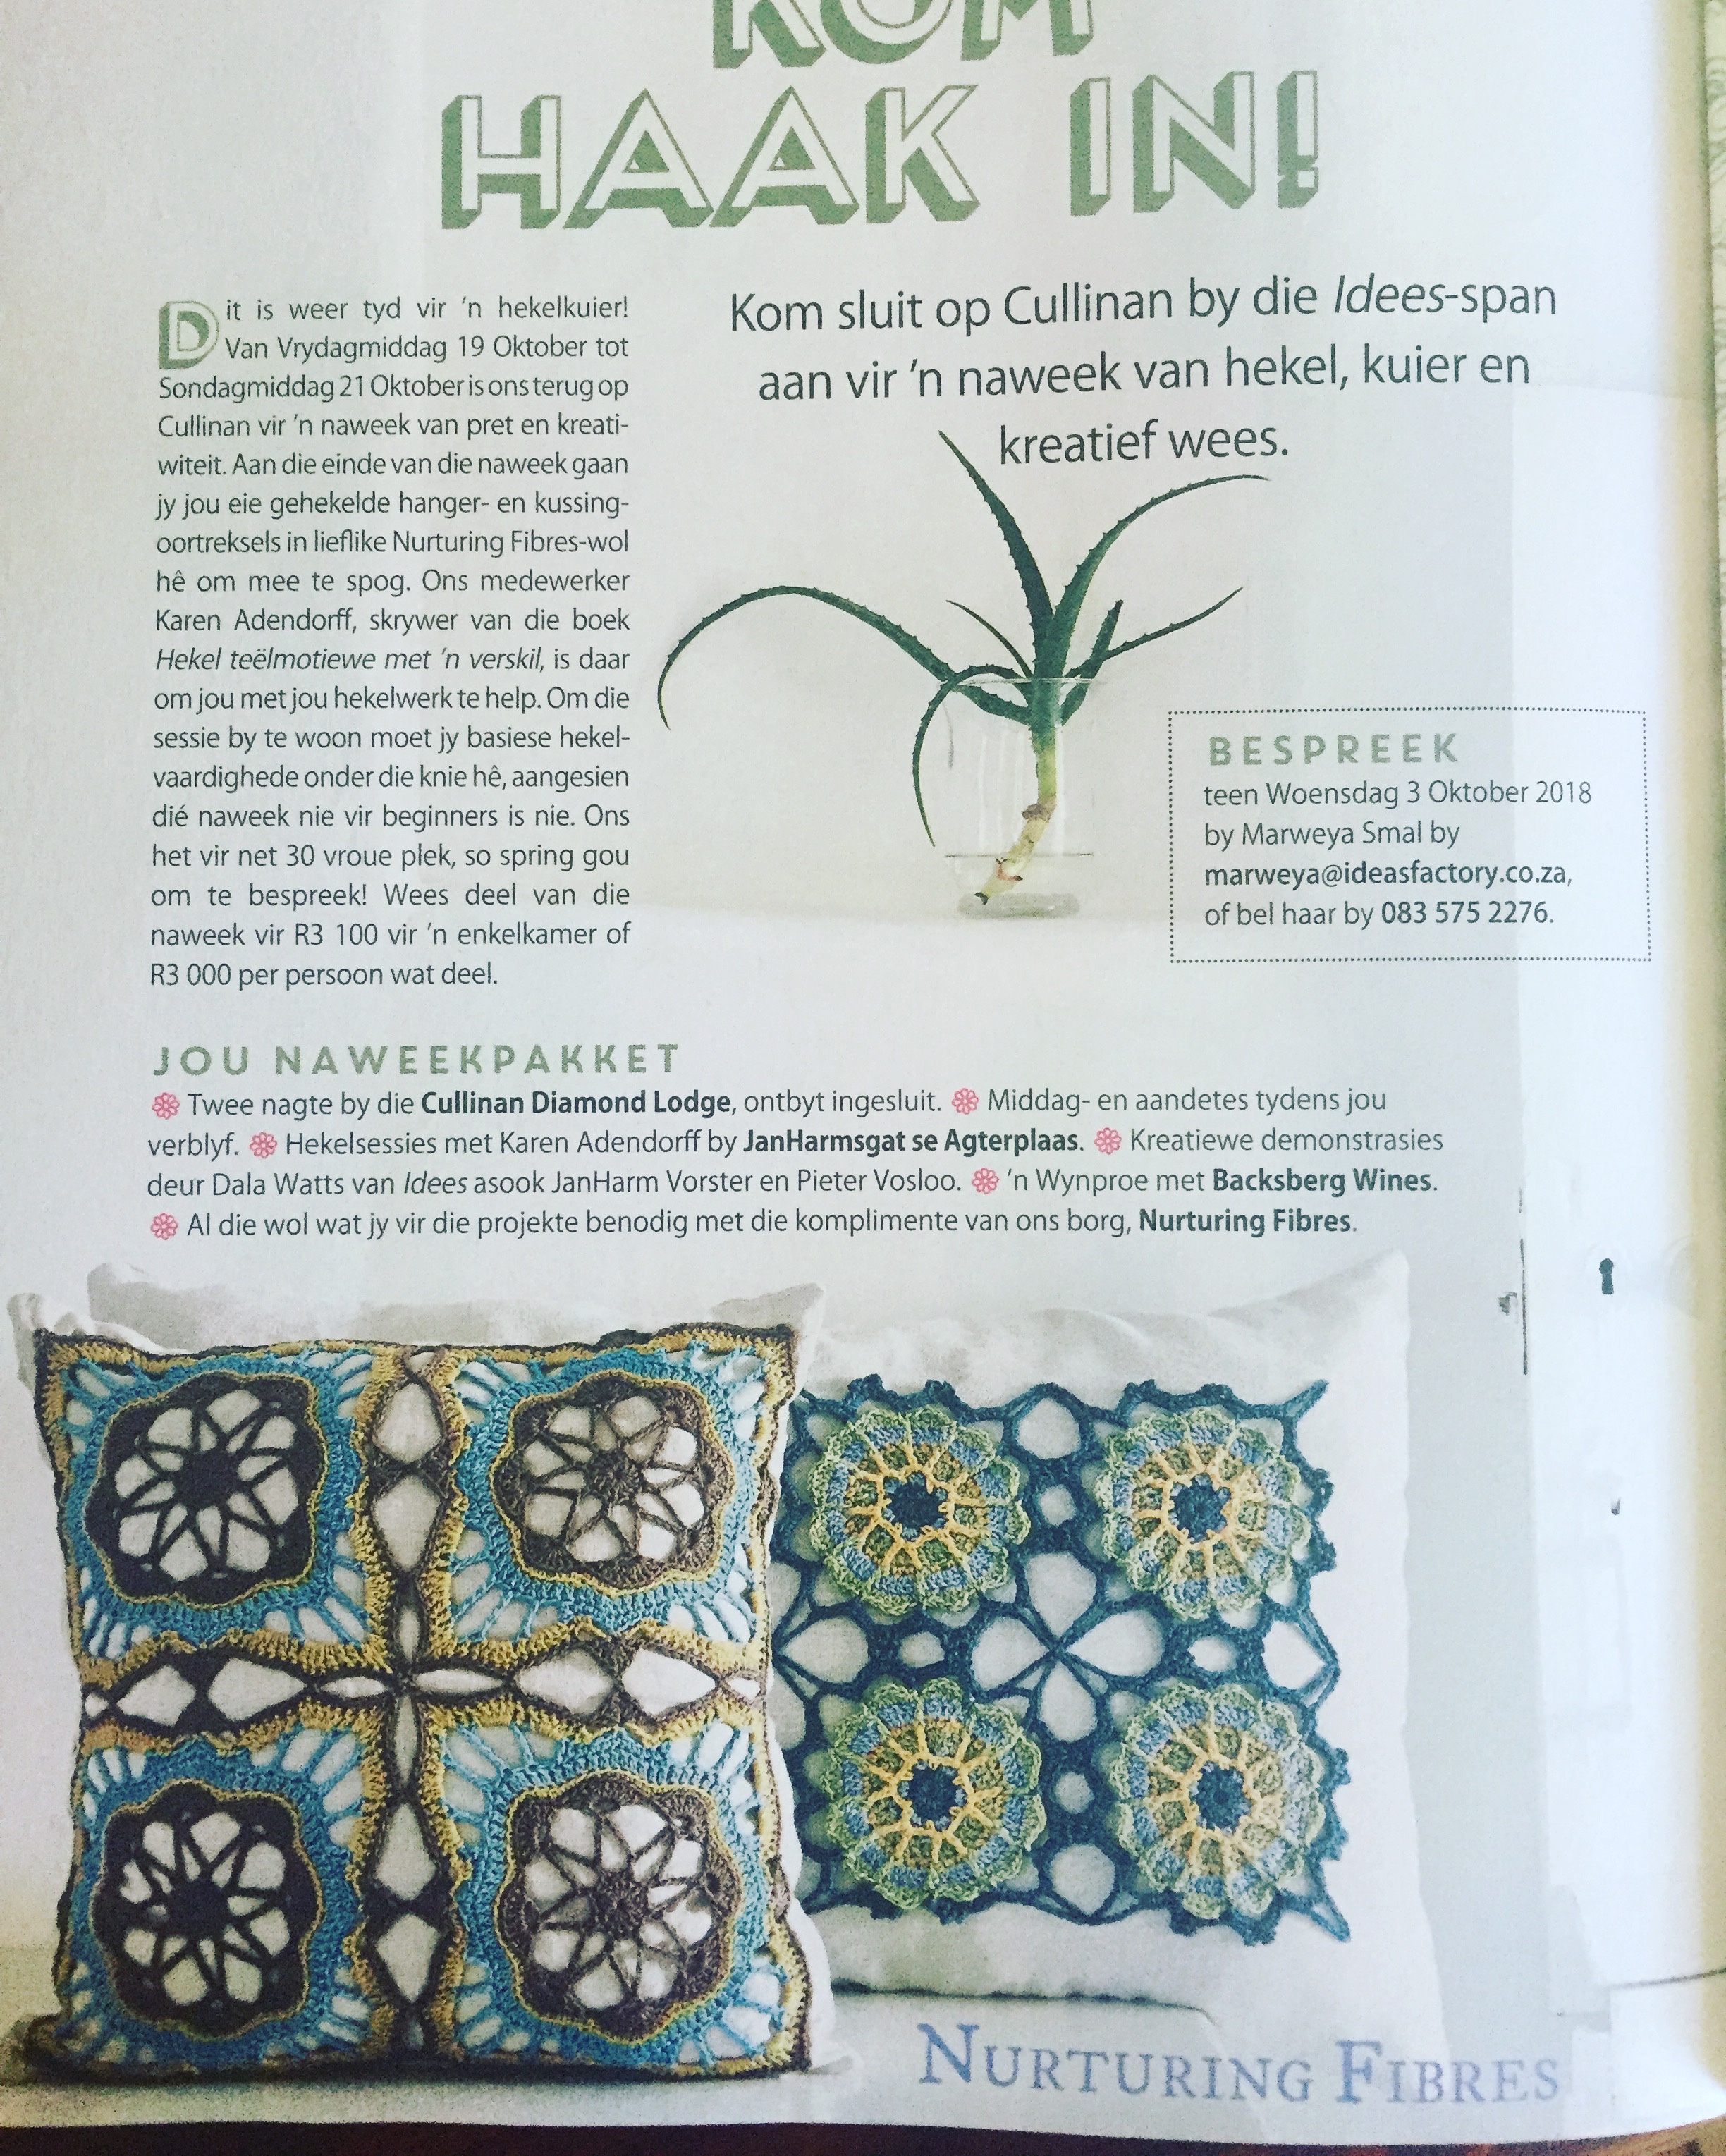
Upcoming Workshops for September and beginning October:


Have a wonderful week!
Kind regards
Karen Adendorff


")
")


")
")


 This pattern makes beautiful gift tags, bunting, tree decorations or book marks. I made my tree in MoYa 100 % cotton DK yarn from my stash with a 3 mm hook. This pattern is written in between my holiday obligations on request of whole lot of facebookers. So if there is a written mistake please bear with me as I am using holiday time and have limited testing opportunities. Hopefully everything is in order.